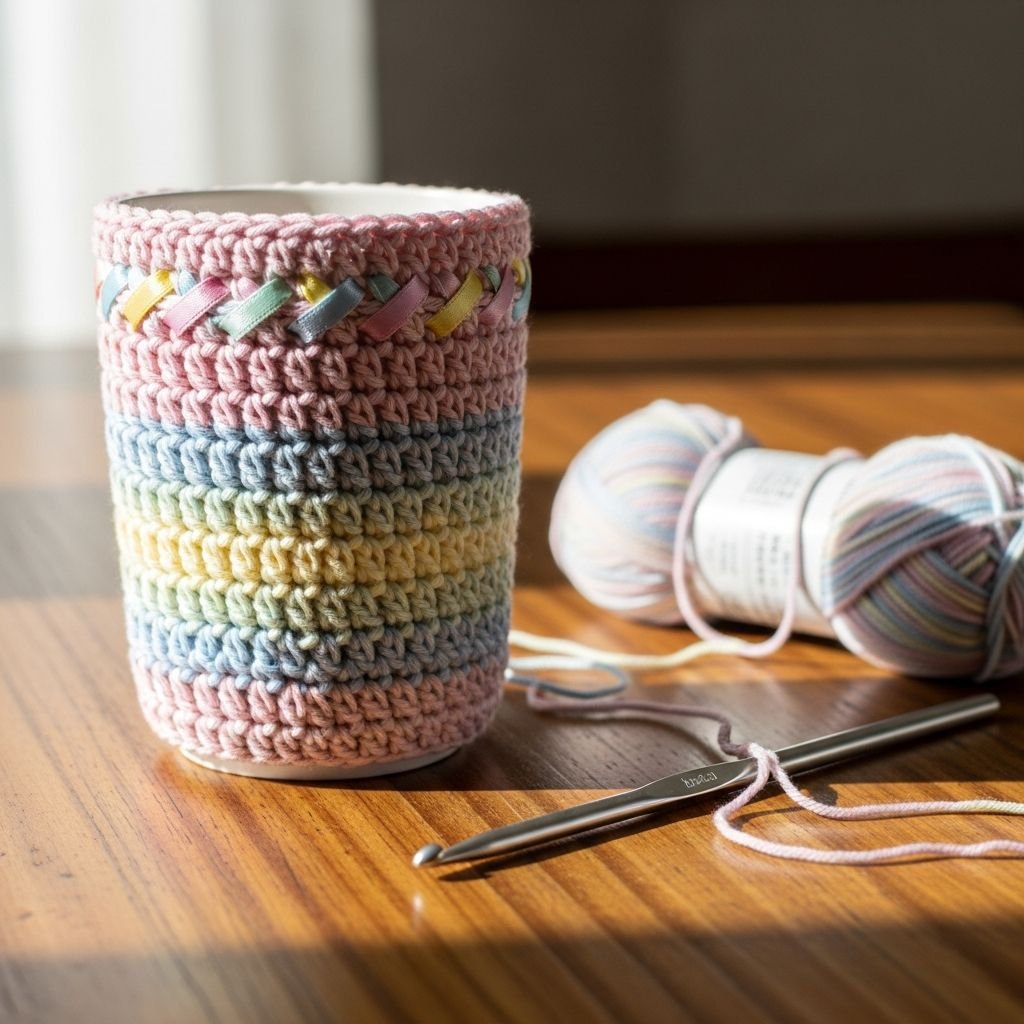
The Pastel Ribbon Cup Sleeve: A Professional DIY Tutorial-Transform your daily caffeine fix into a stylish experience with this elegant crocheted cup sleeve. Featuring a soft blush pink texture and a classic cream bow, this project is the perfect blend of functionality and cottagecore aesthetics. Whether you are making it for yourself or as a thoughtful gift, this tutorial will guide you through every stitch to ensure a snug, professional fit for any standard coffee cup while protecting your hands from heat in style.
Materials Needed
- Medium weight (Size 4) cotton yarn in Soft Pink
- Medium weight (Size 4) cotton yarn in Cream
- 4.0mm (G) Crochet Hook
- Tapestry needle
- Scissors
- Measuring tape
Abbreviations
- ch: chain
- sl st: slip stitch
- sc: single crochet
- dc: double crochet
- st: stitch
Step 1: Foundation and Sizing

- Start by creating a slip knot with the pink yarn and chaining 32 stitches (or a length that snugly fits the circumference of your cup).
- Wrap the chain around the middle of your cup to verify the fit, ensuring it has about a half-inch of stretch for a secure hold.
- Carefully join the last chain to the first chain with a slip stitch, being mindful not to twist the chain during the process.
- Chain 2 to serve as your turning chain; this will count as the first double crochet of the next round.
Step 2: Building the Textured Body

- Work one double crochet (dc) into each chain stitch around the entire foundation ring.
- When you reach the end of the round, join with a slip stitch to the top of your initial chain-2 to close the circle.
- Chain 2 and continue working rounds of double crochet until the sleeve reaches approximately 3 inches in height.
- Maintain an even tension throughout to ensure the sleeve doesn’t taper unevenly as you move upward.
- For a standard cup, 5 to 6 rounds of double crochet are usually sufficient for full coverage.
Step 3: Finishing the Sleeve Base

- Once the desired height is reached, complete the final round with a slip stitch into the starting chain-2.
- Cut the pink yarn, leaving a 6-inch tail for weaving, and pull the tail through the last loop to fasten off securely.
- Using your tapestry needle, weave the tail ends into the back of the stitches to hide them from view.
- Inspect the sleeve for any loose loops or uneven stitches before moving on to the decorative bow element.
Step 4: Crafting the Decorative Bow

- Switch to the cream yarn and create a foundation chain of 15 stitches to begin the main loop of the bow.
- Work one single crochet (sc) into the second chain from the hook and in each stitch across the row.
- Chain 1 and turn, then work 2-3 more rows of single crochet to create a sturdy rectangular strip.
- Fasten off the cream yarn and sew the two ends of the strip together to form a flattened circle that will become the bow loops.
Step 5: Forming the Bow Center and Assembly

- Create a second, much smaller strip of cream yarn (approx. 5-6 chains long and 2 rows wide) to serve as the center knot.
- Pinch the center of the larger cream circle to create the classic bow shape, then wrap the small strip around the pinched section.
- Use your tapestry needle to sew the center strip closed at the back, pulling it tight enough to define the bow’s ‘wings’.
- Leave a long tail on this center strip, as you will use it to attach the bow to the pink sleeve in the next step.
Step 6: Final Attachment and Finishing

- Position the cream bow on the front center of your pink sleeve, ensuring it is level and centered between the top and bottom edges.
- Using the long tail from the bow center and your tapestry needle, sew through both the bow and the sleeve layers several times for a firm hold.
- Knot the yarn securely on the inside of the sleeve where it won’t be visible or felt against the cup.
- Weave in all remaining yarn tails and slide the finished sleeve onto your favorite cup to enjoy your handcrafted creation.
Frequently Asked Questions
Q: Can I use acrylic yarn instead of cotton for this project?
A: While acrylic can be used, cotton is highly recommended because it is more heat-resistant and absorbent, which helps handle condensation or hot spills much better than synthetic fibers.
Q: How do I make this fit a larger ‘Venti’ or tapered cup?
A: To accommodate a tapered cup, increase your starting chain by 2-4 stitches and use a slightly larger hook for the top half of the rounds to create a natural flare.
Q: Is this cup sleeve machine washable?
A: Yes! If made with 100% cotton, you can machine wash it on a gentle cycle. However, laying it flat to dry is best to maintain the shape of the bow and prevent shrinkage.
Conclusion
Congratulations on completing your professional cup sleeve! This simple yet sophisticated project is a fantastic way to practice working in the round and mastering basic embellishments. Not only is it a sustainable alternative to cardboard sleeves, but it also brings a touch of handmade warmth to your daily routine. Happy crocheting!