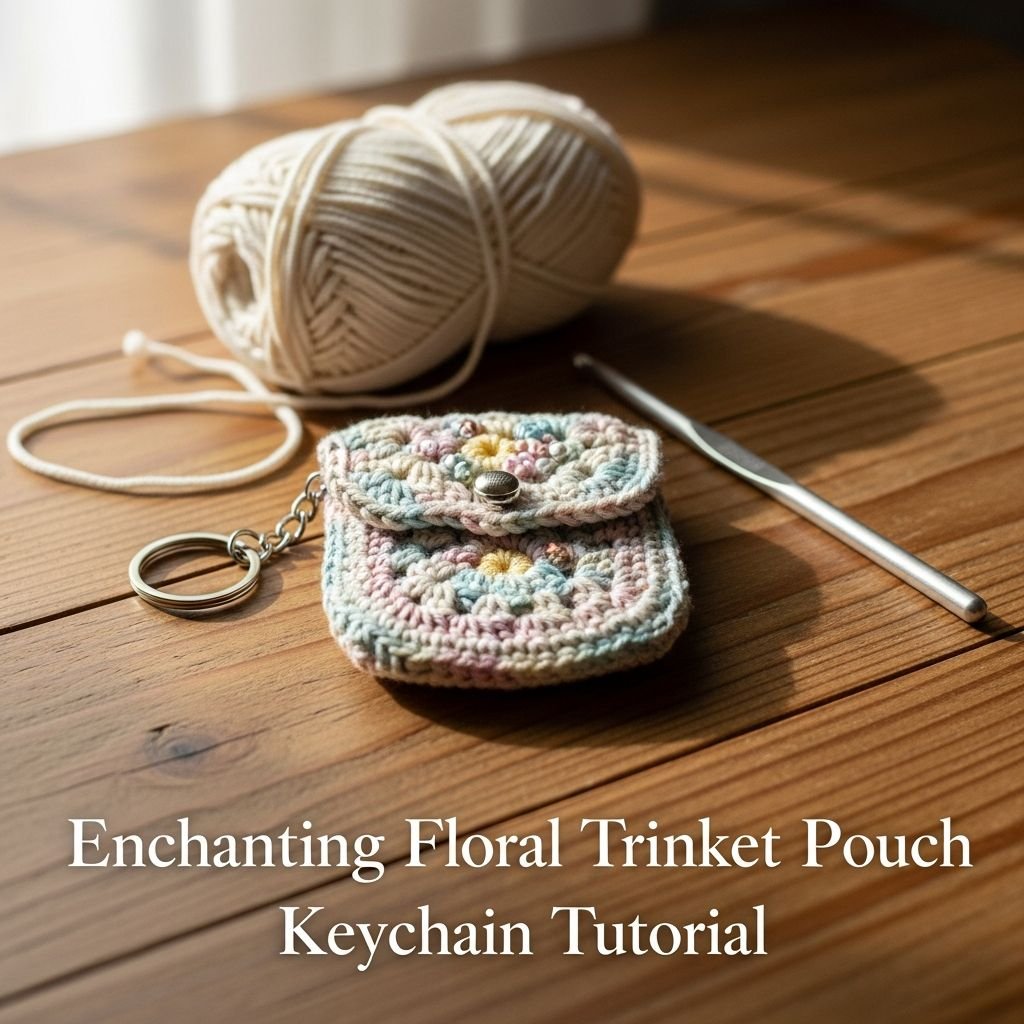
Enchanting Floral Trinket Pouch Keychain Tutorial-Welcome to the magical world of miniature crochet! Today, we are crafting a charming, custom-fitted pouch designed to safely carry your favorite figurines and small treasures. This ‘Loop Trinket’ project combines basic crochet techniques with decorative beading and floral appliques to create a personalized accessory that is as functional as it is adorable. Whether you are a seasoned pro or a beginner looking to branch out into mixed media, this project is the perfect way to use up yarn scraps and leftover beads.
Materials Needed
- Worsted weight cotton or acrylic yarn in soft yellow
- 3.5mm (E) crochet hook
- Small plastic figurine (approx. 2-3 inches tall)
- Assorted decorative beads (pearls, stars, and flowers)
- Purple plastic lobster keychain clasp
- Large layered fabric flower applique
- Tapestry needle and embroidery scissors
- Hot glue or fabric glue for the applique
Abbreviations
- ch: chain
- sc: single crochet
- sl st: slip stitch
- st(s): stitch(es)
- inc: increase (2 sc in one stitch)
- mr: magic ring
Step 1: Forming the Pouch Base

- Begin by creating a Magic Ring with the yellow yarn to ensure a tight, hole-free bottom.
- Work 6 single crochet (sc) stitches into the magic ring and pull the tail to close securely.
- For Round 2, work an increase (2 sc) into every stitch around to reach a total of 12 stitches.
- For Round 3, work *1 sc in the first stitch, 1 inc in the next* repeat 6 times for a total of 18 stitches.
- Check the size against the bottom of your figurine; if it is wider, add one more round of gradual increases.
Step 2: Building the Pouch Body

- In the next round, work 1 sc into the back loops only (BLO) of every stitch to create a sharp edge for the bottom of the pouch.
- Continue working in continuous rounds of standard single crochet (sc) through both loops.
- Maintain a consistent tension to ensure the walls of the pouch are sturdy and hold their shape.
- Continue stitching until the pouch reaches the height of the figurine’s shoulders, roughly 8-10 rounds.
- Slip stitch into the next stitch to level off the round before moving to the drawstring row.
Step 3: Creating the Drawstring Eyelets

- Chain 2 (counts as first dc or creates height) then chain 1 more for the gap.
- Skip one stitch from the previous row and work 1 sc into the following stitch.
- Repeat the pattern of *ch 1, skip 1, 1 sc* all the way around the top edge of the pouch.
- These small gaps will serve as the eyelets for your drawstring cord to pass through.
- Finish the round with a slip stitch into the starting chain and fasten off the yarn, leaving a short tail for weaving.
Step 4: Crafting the Beaded Handle

- Cut a 10-inch length of yellow yarn or sturdy clear nylon thread.
- Thread one end through the purple lobster clasp and secure it with a double knot.
- String your beads onto both strands of the yarn, alternating pearls, star beads, and flower beads for a whimsical look.
- Ensure the beaded section is long enough to loop comfortably over the figurine’s head (approx. 4 inches).
- Secure the ends of the beaded loop to the inside top edges of the pouch using a tapestry needle and firm knots.
Step 5: The Finishing Touches

- Create a drawstring by chaining a length of yellow yarn approximately 12 inches long.
- Weave the chain through the eyelets created in Step 3 and tie small flower beads to the ends of the cord.
- Apply a small amount of fabric glue or hot glue to the back of the layered flower applique.
- Press the flower firmly onto the center-front of the yellow pouch and let it dry completely.
- Place your figurine inside the pouch, tighten the drawstring, and clip the keychain to your favorite bag!
Frequently Asked Questions
Q: How do I make the pouch fit a larger or smaller doll?
A: Simply adjust the base rounds. For a larger doll, continue increasing by 6 stitches each round (e.g., Round 4: 24 sts, Round 5: 30 sts) until the base matches the diameter of the doll’s widest part.
Q: What is the best way to clean my trinket keychain?
A: Since this project uses beads and glued appliques, I recommend spot cleaning with a damp cloth and mild soap. Do not submerge in water or put in a washing machine, as it may damage the decorations.
Q: Can I use a different yarn weight for this project?
A: Yes! However, using a thinner yarn (like lace weight) will produce a much smaller pouch, while bulky yarn will make a very large one. Always match your hook size to your yarn weight for the best results.
Conclusion
Congratulations on completing your Enchanting Floral Trinket Pouch! This project is a wonderful way to express your creativity through color and texture. Now that you’ve mastered the basic structure, try experimenting with different bead patterns or yarn colors to match all your favorite trinkets. Happy crocheting!