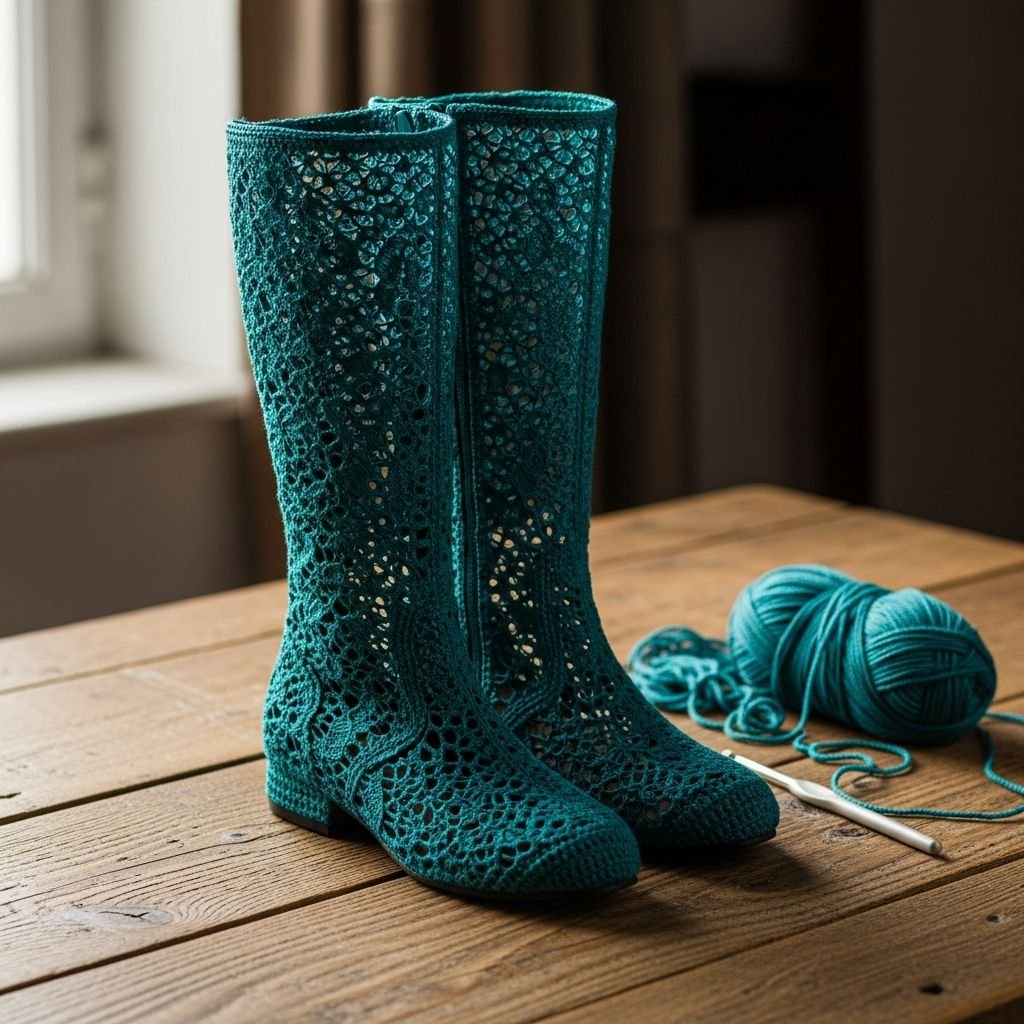
Artisan Teal Lace Knee-High Boots-Transform your footwear collection with these sophisticated, hand-crafted crochet lace boots. By combining the structural integrity of a rubber sole with the delicate aesthetics of shell-stitch lace, these knee-highs offer a unique bohemian flair that is as durable as it is beautiful. This tutorial will guide you through the process of working directly onto a sole to create a professional-grade pair of boots.
Materials Needed
- 400-500g of DK weight Cotton/Acrylic blend yarn in Teal
- 3.5mm and 4.0mm crochet hooks
- 1 pair of rubber boot soles or flat shoes to use as a base
- Awl or leather punch for prepping soles
- Tapestry needle and measuring tape
- Stitch markers
Abbreviations
- ch: chain
- sc: single crochet
- dc: double crochet
- sl st: slip stitch
- fpdc: front post double crochet
- bpdc: back post double crochet
- sk: skip
Step 1: Preparing the Sole Foundation

- Use a leather punch or awl to create holes around the top perimeter of your rubber soles at 1cm intervals.
- Ensure the holes are positioned consistently about 0.5cm from the top edge to prevent the yarn from tearing the rubber.
- Attach your yarn to the center back heel hole with a slip knot and work 1-2 single crochets into every hole around the sole.
- Join the round with a slip stitch, ensuring your final stitch count is an even number to accommodate the leg pattern.
Step 2: Constructing the Foot and Toe Box

- Work in continuous rounds of single crochet (sc) for the first 3 rows to build a sturdy base wall.
- On the 4th row, begin decreases at the center of the toe by working 2sc together to start shaping the foot.
- Continue working rows of sc while decreasing at the toe and instep areas to follow the natural curve of your foot.
- Stop once the crochet fabric covers the top of the foot and reaches the narrowest part of the ankle.
Step 3: Setting Up the Lace Transition

- At the ankle height, transition to working in joined rounds rather than continuous spirals to keep the lace pattern level.
- Work one row of sc around the ankle opening, adjusting your stitch count to be a multiple of 6.
- This row acts as the anchor for the decorative shell pattern that will form the body of the boot leg.
- Place a stitch marker at the center back to track your round starts clearly.
Step 4: Executing the Shell Lace Pattern

- Round 1 of Lace: *Sk 2 sts, 5 dc in next st (shell), sk 2 sts, sc in next st; repeat from * around.
- Round 2 of Lace: Ch 3 (counts as dc), 2 dc in same st, sk 2 dc, sc in center of shell, *sk 2 sts, 5 dc in sc of previous row; repeat from * around.
- Continue alternating these rows so that shells are worked into the sc spaces of the previous row, creating an offset lace texture.
- Maintain even tension to ensure the lace does not pull too tight around the calf.
Step 5: Shaping for the Calf and Height

- As you work toward the widest part of the calf, switch to the 4.0mm hook to allow the lace to expand naturally.
- If more width is needed, add a ‘ch 1’ between your shell and the sc to increase the circumference without breaking the pattern.
- Continue repeating the shell pattern until the boot reaches approximately 2 inches below the bottom of the knee.
- Try the boot on frequently during this stage to ensure it slides on comfortably over the heel.
Step 6: Adding the Ribbed Knee Cuff

- Work one row of dc in every stitch and space around the top edge of the lace section.
- On the next row, alternate fpdc and bpdc (Front Post and Back Post Double Crochet) across the entire round.
- Repeat the ribbing pattern for 8-10 rows to create a thick, elastic cuff that will hold the boot up securely.
- Fasten off with a long tail and weave in the ends on the inside of the cuff to hide the join.
Step 7: Final Finishing and Reinforcement

- Turn the boot inside out and use a tapestry needle to securely weave in all yarn tails from the start and finish.
- Optional: Use a small amount of waterproof shoe glue along the inner seam where the yarn meets the sole for added longevity.
- Steam block the lace section lightly (avoiding the rubber sole) to open up the shell pattern and even out the stitches.
- Repeat the entire process for the second boot, counting your rows carefully to ensure a perfectly matched pair.
Frequently Asked Questions
Q: What kind of yarn is best for these boots?
A: A cotton and acrylic blend is ideal. The cotton provides the stitch definition and breathability needed for lace, while the acrylic adds the necessary stretch and durability for footwear.
Q: How do I prevent the boots from sliding down my legs?
A: The ribbed cuff at the top is designed to provide tension. If you find they still slide, you can weave a thin strand of elastic thread through the inside of the ribbed cuff for extra grip.
Q: Can I wash these boots?
A: Yes, but they should be hand-washed only. Use cool water and a mild detergent, avoid soaking the rubber soles for too long, and always air dry them away from direct heat to maintain the shape.
Conclusion
Congratulations on completing your Artisan Teal Lace Boots! This project is a true labor of love that bridges the gap between traditional craft and modern fashion. Wear them with pride, knowing you’ve mastered the complex art of crocheting functional, stylish footwear. Happy crafting!