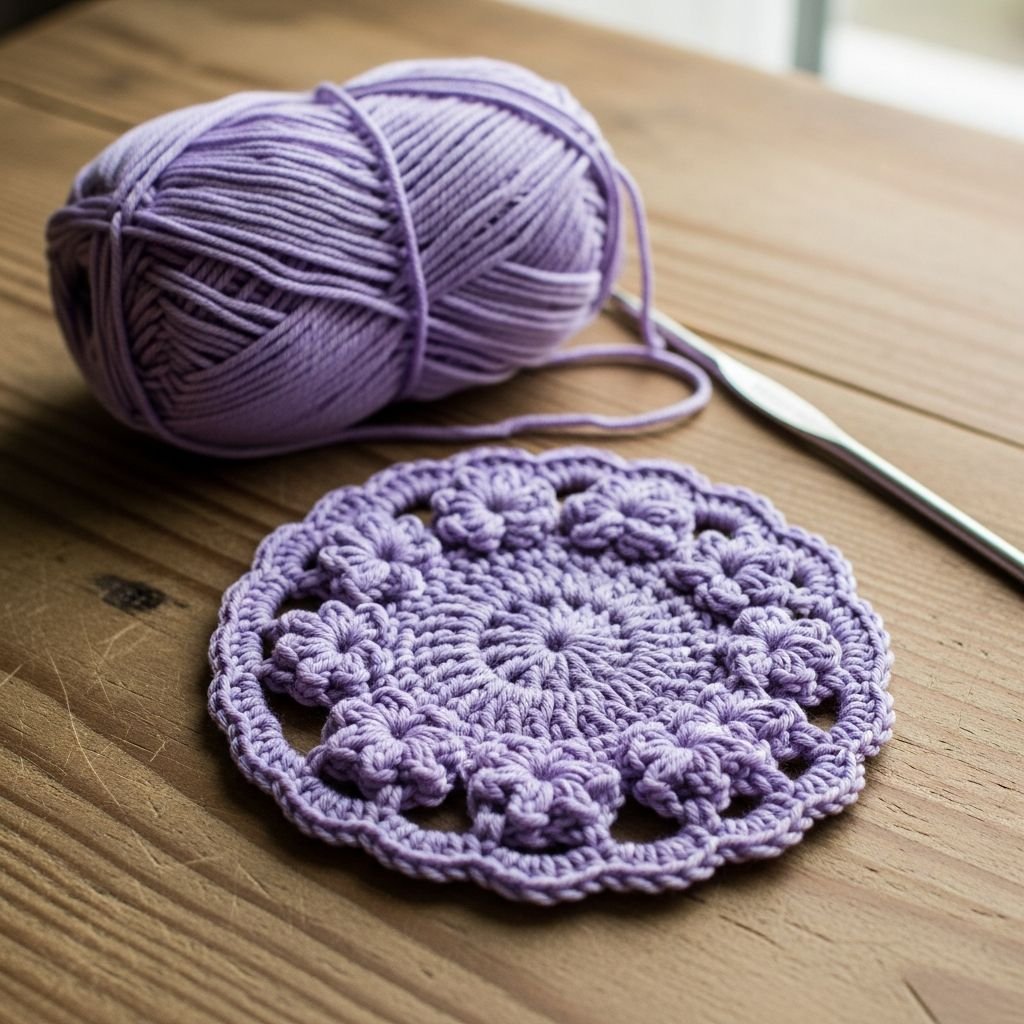
Elegant Lavender Field Puff Flower Coaster-Transform your coffee table into a blooming garden with this exquisite puff flower coaster. This 3D design features a textured center surrounded by a ring of delicate, tulip-like puff stitches in varying shades of purple. Perfect for intermediate crocheters looking to practice color changes and dimensional stitch work, these coasters are as functional as they are beautiful.
Materials Needed
- 4-ply cotton yarn in Dark Purple, Light Purple, White, and Sage Green
- 3.5mm (E) crochet hook
- Tapestry needle for weaving in ends
- Sharp fabric scissors
- Stitch markers (optional)
Abbreviations
- ch: chain
- sl st: slip stitch
- sc: single crochet
- dc: double crochet
- puff: puff stitch (yarn over, insert hook, pull up a loop 5 times, yarn over, pull through all loops, ch 1 to close)
- st: stitch
- sp: space
Step 1: Creating the Floral Core

- Begin with the Dark Purple yarn and create a magic ring to ensure a tight, professional center.
- Chain 2 (does not count as a stitch) and work 12 double crochet stitches into the magic ring.
- Pull the tail tightly to close the center hole and join with a slip stitch to the first double crochet.
- Fasten off the Dark Purple yarn and weave in the starting tail immediately to keep your work tidy.
Step 2: The Inner White Petal Base

- Join the White yarn into any stitch from the previous round with a slip stitch.
- Chain 3 (counts as first dc) and work another dc into the same stitch.
- Work 2 double crochets into every stitch around the circle for a total of 24 stitches.
- Join with a slip stitch to the top of the beginning chain-3 and fasten off the White yarn.
- Ensure your tension is consistent so the circle remains flat and doesn’t bowl upwards.
Step 3: Crafting the Green Stem Foundation

- Attach the Sage Green yarn to any stitch; this round creates the ‘V’ shapes that will hold our 3D flowers.
- Chain 4 (counts as 1 dc and 1 ch), then work 1 dc into the same stitch to form a V-stitch.
- Skip one stitch and work a V-stitch (dc, ch 1, dc) into the next stitch, repeating this sequence around.
- You should end with 12 green V-stitch clusters; join with a slip stitch to the third chain of the start.
- This green border acts as the ‘leaves’ and structural support for the upcoming puff stitches.
Step 4: Working the First Color of Puff Petals

- Join the Dark Purple yarn in any chain-1 space of a green V-stitch.
- Work a large puff stitch into the space: yarn over, pull up a loop 5 times in the same space, yarn over and pull through all 11 loops, then ch 1.
- Chain 2 for spacing and skip the next green V-stitch (this will be filled by the lighter color later).
- Repeat the puff stitch and ch 2 sequence in every other V-stitch around the circle.
- Join with a slip stitch to the first puff and fasten off, leaving a tail for weaving.
Step 5: Filling in the Light Purple Petals

- Attach the Light Purple yarn into any of the empty green V-stitch spaces left in the previous step.
- Work a puff stitch (yarn over and pull up 5 times) into the green space, making sure it sits snugly between the dark purple ones.
- Chain 2 and pass the chain behind or in front of the dark purple puff to reach the next empty green space.
- Complete the round so you have 6 dark purple and 6 light purple flowers alternating around the edge.
- Join with a slip stitch and fasten off all yarn ends.
Step 6: Finishing and Blocking

- Using a tapestry needle, carefully weave in all remaining yarn tails on the underside of the coaster.
- Gently pull and shape each puff stitch with your fingers to ensure they stand upright and look like flower buds.
- Lightly steam block the center of the coaster (avoiding the 3D puffs) to ensure it sits perfectly flat on your table.
- Check all join points for security to ensure the coaster can withstand daily use and washing.
Frequently Asked Questions
Q: What is the best yarn for these coasters?
A: 100% Cotton yarn is highly recommended. It is heat-resistant, absorbent for condensation, and holds the definition of the puff stitches much better than acrylic.
Q: My coaster isn’t lying flat, what should I do?
A: If the center is curling, your tension may be too tight or you may have missed a stitch in the white round. If it’s waving, you may have added too many stitches. Ensure you have exactly 12 green V-stitches.
Q: Are these coasters machine washable?
A: Yes, if made with cotton, they can be machine washed on a delicate cycle. However, to maintain the ‘puff’ of the flowers, hand washing and air drying is recommended.
Conclusion
Congratulations on completing your Lavender Field Puff Flower Coaster! This project is a wonderful way to use up scrap yarn while creating a sophisticated piece of home decor. Whether you make a set for yourself or as a thoughtful gift, these textured blooms are sure to brighten any tea break. Happy crocheting!