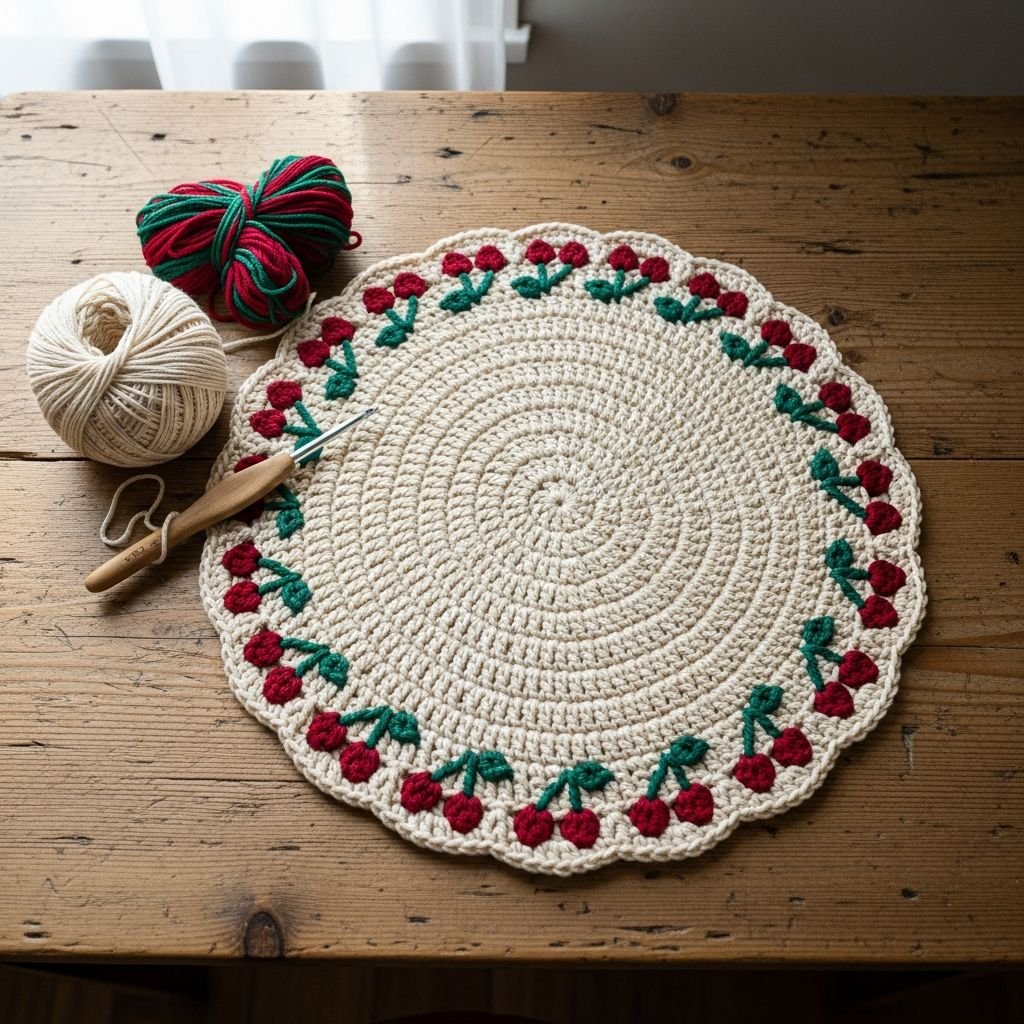
The Radiant Orchard: A Radial Textured Tablecloth with Cherry Border-Transform your dining space with this sophisticated, handcrafted masterpiece. This pattern utilizes a sunburst construction to create a stunning geometric texture, finished with a whimsical ‘cherry and leaf’ border that adds a touch of cottagecore charm to any home.
Materials Needed
- 800-1000g White Cotton Blend Yarn (Weight 4/Worsted)
- 100g Forest Green Cotton Yarn
- 100g Cherry Red Cotton Yarn
- 4.0mm (G) Crochet Hook
- Stitch markers
- Tapestry needle
- Fabric measuring tape
Abbreviations
- ch: chain
- sl st: slip stitch
- sc: single crochet
- dc: double crochet
- fpdc: front post double crochet
- inc: increase
- st: stitch
Step 1: The Foundation and Central Hub

- Begin with a magic ring using the white yarn to ensure a tight, seamless center.
- Chain 3 (counts as your first double crochet) and work 11 dc into the ring for a total of 12 stitches.
- Pull the tail tight to close the center hole completely and join with a slip stitch to the top of the ch-3.
- Place a stitch marker in the first stitch of the round to help track your spiral progression.
Step 2: Establishing the Sunburst Ribs

- In the second round, work 2 dc into every stitch around to double your count to 24 stitches.
- In the third round, establish the ribbing by alternating 1 dc and 1 fpdc (front post double crochet) in each section.
- The fpdc will create the raised vertical lines seen in the final design; ensure these are worked loosely to prevent the fabric from buckling.
- Always join each round with a slip stitch and chain 2 or 3 to begin the next level.
Step 3: Expanding the Main Body

- Continue working in the round, increasing the number of dc stitches between each fpdc ‘rib’ by one in every row.
- Ensure the fpdc is always worked into the fpdc of the previous row to maintain the straight, radiating lines.
- The increase should happen in the first dc stitch after each fpdc to create the subtle spiral effect visible in the texture.
- Check your work frequently by laying the piece flat; if it starts to wave, your increases are too frequent; if it cups, they are too sparse.
Step 4: Reaching the Desired Diameter

- Repeat the expansion pattern until the piece reaches the diameter of your table’s surface.
- Once the flat top is complete, stop the increases and work ‘even’ (one stitch per stitch) for 5-10 rounds to allow the fabric to drape naturally over the table edge.
- Switch back to a slightly smaller hook size for the final white round to provide a firm base for the decorative border.
Step 5: Crafting the Green Leaf Border

- Fasten off the white yarn and join the Forest Green yarn at any stitch on the edge.
- Work a foundation row of sc around the entire perimeter.
- Create the ‘leaves’ by working a shell stitch pattern: (sc, ch 3, 2 dc, ch 3, sc) all into the same stitch, skip 2 stitches, and repeat.
- This creates a scalloped, leafy appearance that provides the base for the cherry accents.
Step 6: Adding the Cherry Pompoms

- Using the Cherry Red yarn, create small stuffed spheres (amigurumi style) or large 5-dc bobble stitches.
- If making spheres, work 6 sc in a magic ring, 1 round of increases, 1 round even, and 1 round of decreases before stuffing and closing.
- Securely sew or crochet each red cherry to the center valley of every green scallop.
- Ensure the attachments are tight to prevent the cherries from sagging over time with use.
Step 7: Final Finishing and Blocking

- Weave in all yarn ends securely on the wrong side of the fabric using a tapestry needle.
- Wet block the entire tablecloth by submerging it in lukewarm water, then pinning it to shape on a flat surface until dry.
- Blocking is essential for this pattern to open up the stitches and ensure the radial ribs lay perfectly straight.
Frequently Asked Questions
Q: What type of yarn is best for a table mat?
A: Mercerized cotton is highly recommended because it has a beautiful sheen, excellent stitch definition, and is heat-resistant for hot plates.
Q: How do I make this fit a larger or smaller table?
A: The pattern is easily adjustable; simply continue the ‘Step 3’ increase rounds until the circle matches your table diameter before moving to the drape and border steps.
Q: Can this be machine washed?
A: If made with 100% cotton, it can be machine washed on a delicate cycle in a mesh bag, but lay it flat to dry to maintain the shape of the cherry pompoms.
Conclusion
Congratulations on completing your Orchard Tablecloth! This piece is more than just a table covering; it is a family heirloom that brings texture and personality to your home. Enjoy the process of seeing the radial lines grow, and happy crocheting!