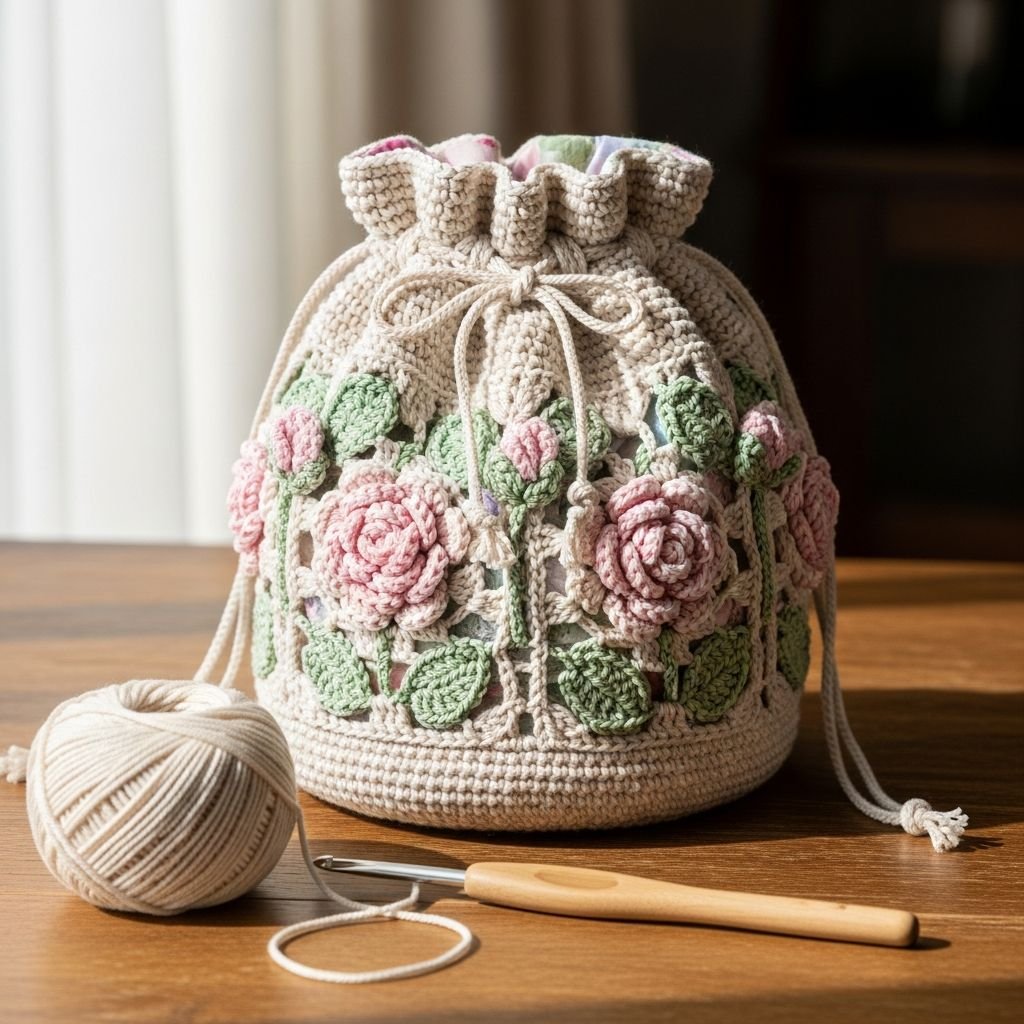
Elegant Rose Garden Drawstring Bag Tutorial-Transform simple yarn into a stunning fashion statement with this Elegant Rose Garden Drawstring Bag. This project combines a sophisticated ribbed texture with the romantic flair of 3D crochet roses. Designed to be both functional and decorative, this bag is perfect for special occasions or as a high-end handmade gift that showcases your mastery of floral embellishments and structural crochet.
Materials Needed
- 200g Worsted weight cotton or acrylic yarn in Cream/White
- 50g Worsted weight yarn in Burgundy or Deep Red
- 25g Worsted weight yarn in Sage Green
- 4.5mm (G) crochet hook
- Tapestry needle and sharp scissors
- Faux leather shoulder strap with lobster clasps
- Metallic ‘Handmade’ label
- Optional: Fabric for interior lining
Abbreviations
- ch: chain
- sc: single crochet
- hdc: half double crochet
- dc: double crochet
- sl st: slip stitch
- BLO: back loop only
- st(s): stitch(es)
Step 1: Constructing the Textured Body

- Create a foundation chain of 46 stitches using the white yarn.
- Row 1: Hdc in the 2nd chain from the hook and in each chain across, then ch 1 and turn.
- Row 2: Hdc in the Back Loop Only (BLO) of every stitch across to create the vertical ridge effect, then ch 1 and turn.
- Repeat Row 2 until your fabric measures approximately 15 inches in length when laid flat.
- The resulting piece should be a large rectangle with distinct vertical ribs.
Step 2: Seaming and Shaping the Pouch

- Fold the rectangular piece in half so the short ends meet, ensuring the ‘right side’ of the texture is facing inward.
- Using a tapestry needle or slip stitches, join the side seam together securely.
- To form the base, weave a long strand of white yarn through the bottom edge of the cylinder and pull tightly to cinch it closed.
- Fasten off and weave in the ends, then turn the bag right-side out to reveal the seamless ribbed exterior.
- Ensure the bottom cinching is tight enough so small items cannot fall through the center hole.
Step 3: Creating the 3D Rose Embellishments

- With burgundy yarn, ch 31. Row 1: (2 dc, ch 1, 2 dc) in the 4th ch from hook, skip 1, repeat across.
- Row 2: Work 6 dc in each ch-1 space across to create a scalloped edge, then fasten off leaving a long tail.
- Roll the scalloped strip into a tight spiral to form a rose shape and use the tail to sew through the bottom layers, securing the shape.
- Repeat this process to create 8 to 10 roses, depending on how full you want the floral rim to look.
- Ensure each rose is tightly secured at the base so it maintains its 3D structure.
Step 4: Crafting the Vine Drawstring

- Using green yarn, create a chain approximately 30 inches long (or double the width of your bag plus 6 inches).
- To create the end leaf: ch 6, sc in 2nd ch, hdc in next, dc in next, hdc in next, (sc, ch 2, sc) in last ch.
- Work back up the other side of the chain with hdc, dc, hdc, and sc to complete the leaf shape.
- Fasten off and repeat the leaf process on the opposite end of the long chain.
- The drawstring should be sturdy enough to hold the weight of the bag’s contents when pulled.
Step 5: Assembly of Floral Rim and Drawstring

- Weave the green drawstring through the stitches of the white bag about 1.5 inches below the top edge.
- Arrange the burgundy roses along the top rim of the bag, sitting just above the drawstring line.
- Using green yarn, work small ‘v’ stitches or leaf-like spikes around the top edge to act as sepals for the roses.
- Carefully sew each rose onto the top edge of the bag, ensuring you only stitch into the white fabric and not through the drawstring path.
- Check that the drawstring still slides freely after all roses are attached.
Step 6: Hardware and Finishing Touches

- Attach the metallic ‘Handmade’ label to the center front of the bag using a matching thread.
- Clip the faux leather strap to the sides of the bag; if your bag lacks rings, crochet two small loops on the sides to hold the clasps.
- Inspect the interior for any loose yarn tails and weave them in securely to ensure a professional finish.
- Optional: Hand-sew a simple cotton circle lining into the interior if you plan to carry heavy items.
- Give the roses a final fluff and adjustment to ensure they sit upright and look full.
Frequently Asked Questions
Q: How do I prevent the bag from stretching out over time?
A: Using a non-elastic yarn like mercerized cotton is the first step. For ultimate durability, I highly recommend sewing a fabric lining inside the bag to support the weight of your items.
Q: Can I wash this bag?
A: Because of the 3D roses and leather strap, I recommend spot cleaning only. If you must wash it, remove the strap and hand wash in cold water, then reshape the roses while damp and lay flat to dry.
Q: How can I make the roses look more realistic?
A: Try varying the tension as you roll the rose strip. Keep the center very tight and let the outer ‘petals’ be slightly looser to mimic a blooming flower.
Conclusion
Congratulations on completing your Rose Garden Drawstring Bag! This piece is more than just a container; it is a wearable work of art. By mastering the ribbed texture and the assembly of 3D elements, you’ve leveled up your crochet skills significantly. Wear your new creation with pride, and don’t be surprised when people ask where you bought such a unique designer piece!