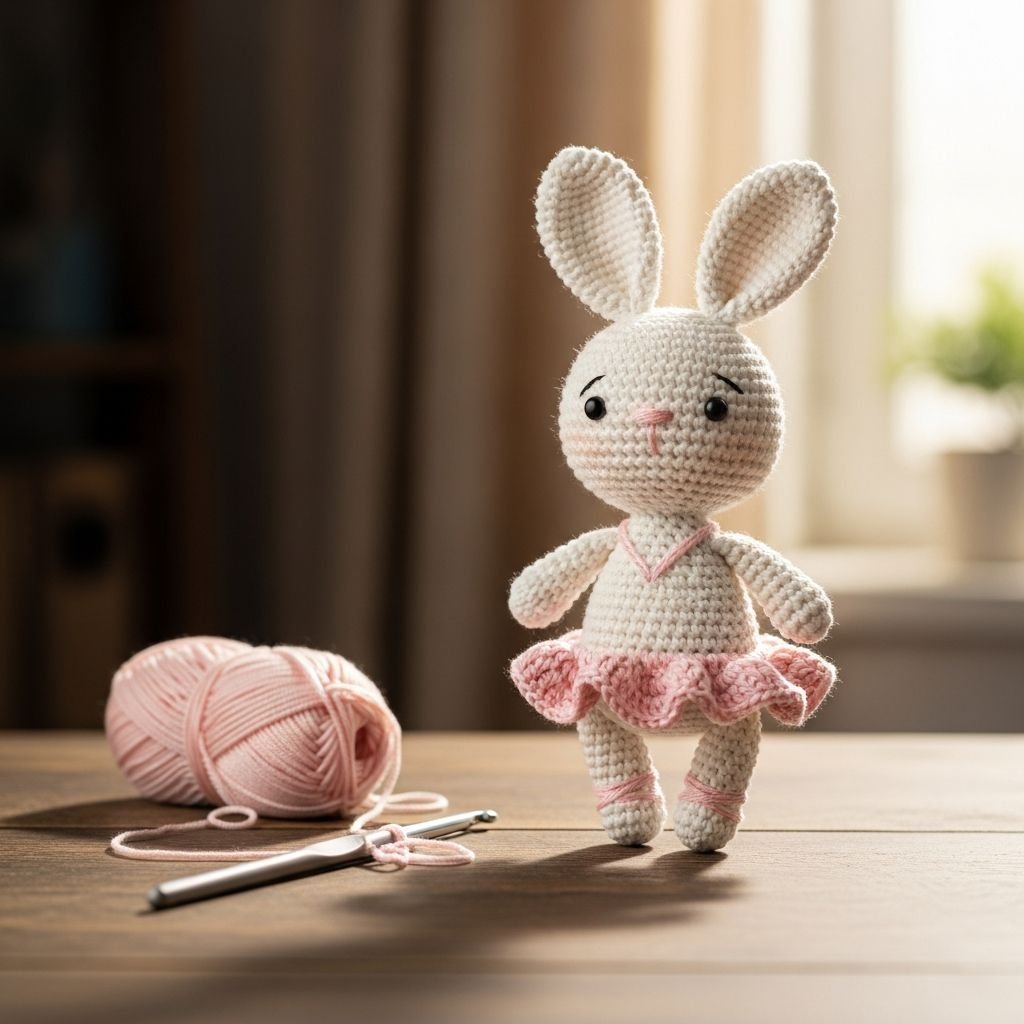
Enchanting Ballerina Bunny Amigurumi Tutorial-Welcome to our masterclass on creating this exquisite Ballerina Bunny. This project combines classic amigurumi techniques with elegant garment shaping to create a timeless heirloom doll. Whether you’re making a gift for a child or adding to your collection, this bunny’s soft floppy ears and voluminous pink dress make it a standout piece of fiber art.
Materials Needed
- Medium weight (4) cotton/acrylic blend yarn in White and Pastel Pink
- 2.5mm or 3.0mm crochet hook
- 10mm black safety eyes
- Polyester fiberfill stuffing
- Tapestry needle and pink embroidery thread
- Stitch markers
Abbreviations
- ch: chain
- sc: single crochet
- dc: double crochet
- inc: increase (2 sc in one stitch)
- dec: invisible decrease
- st: stitch
- sl st: slip stitch
- MR: magic ring
Step 1: The Rounded Head

- Start with white yarn and create a Magic Ring (MR) with 6 sc.
- Work in continuous rounds, increasing by 6 stitches each round until you reach a total of 54 or 60 stitches to achieve the wide, rounded shape.
- Crochet 12-15 rounds even (without increases) to build the height of the head.
- Insert 10mm safety eyes between rounds 18 and 19, leaving approximately 12 stitches between them for a wide, expressive face.
- Begin the decrease rounds (sc 7, dec) and continue reducing until the opening is small, stuffing firmly with fiberfill before closing.
Step 2: Long Floppy Ears

- Using white yarn, start with 6 sc in a MR and increase to 12 sc in the second round.
- Maintain a count of 18-24 stitches for the width and work even rounds for approximately 25-30 rows to create long, elegant ears.
- Do not stuff the ears; they should remain flat to drape naturally over the bunny’s head.
- Flatten the opening of the ear and sc across both layers to seal it, leaving a long tail for sewing later.
Step 3: Slender Limbs and Torso

- Crochet the arms starting with a MR of 6 sc, working in white yarn to create long, thin cylinders stuffed only at the bottom.
- For the legs, begin with a slightly larger base and work upward; stuff these firmly to ensure the doll can maintain its structure.
- Begin the torso in white, increasing to match the diameter of the head’s base, then work upward for 15-20 rounds.
- Stuff the body progressively as you go, ensuring the neck area is packed very densely to prevent the large head from wobbling.
Step 4: The Tiered Pink Dress

- Switch to pink yarn at the waistline of the doll or join yarn to the front loops of a specific body round.
- Create the bodice by working several rounds of sc, then work into the front loops only to start the skirt expansion.
- To create the ‘puffy’ look, work 3 dc into every single stitch around the waist for the first skirt round.
- Continue with rounds of dc for 5-8 rows until the skirt reaches the desired length, finishing with a round of sc for a clean edge.
Step 5: Accessorizing with the Bow and Shoes

- For the shoes, crochet a small pink oval base and work 3 rounds up, adding a simple chain strap across the center.
- Create the bow by crocheting a small rectangle (sc 10 for 6 rows), then pinch the center and wrap pink yarn tightly around it.
- Sew the shoes onto the feet securely, ensuring the straps face upward toward the knees.
- Attach the bow to the base of one ear or the top of the head using a few hidden stitches.
Step 6: Final Assembly and Embroidery

- Use a tapestry needle and pink embroidery thread to stitch a triangular nose centered between and slightly below the eyes.
- Add a single vertical line descending from the nose to create a simple, cute mouth expression.
- Sew the ears to the top of the head at an angle that allows them to hang down the sides symmetrically.
- Attach the head to the body using a mattress stitch, going through every stitch to ensure a professional, seamless finish.
Frequently Asked Questions
Q: How do I prevent the bunny’s head from drooping?
A: The key is to stuff the neck area extremely firmly. You can also insert a ‘neck support’ like a rolled-up piece of felt or a plastic support rod inside the stuffing to bridge the body and head.
Q: What is the best way to clean this amigurumi doll?
A: Because of the safety eyes and delicate dress, hand washing in cool water with mild detergent is recommended. Reshape the doll while damp and allow it to air dry completely.
Q: Can I use a different yarn weight for this pattern?
A: Yes, but remember that using a thicker yarn (like velvet or chenille) will result in a much larger doll, while thinner yarn will make a miniature version. Always adjust your hook size to ensure your stitches are tight enough so stuffing doesn’t show.
Conclusion
Congratulations on completing your Ballerina Bunny! This project requires patience during the assembly phase, but the result is a stunning, high-quality doll that will be cherished for years. Don’t be afraid to experiment with different dress colors to create a whole troupe of dancers. Happy crocheting!