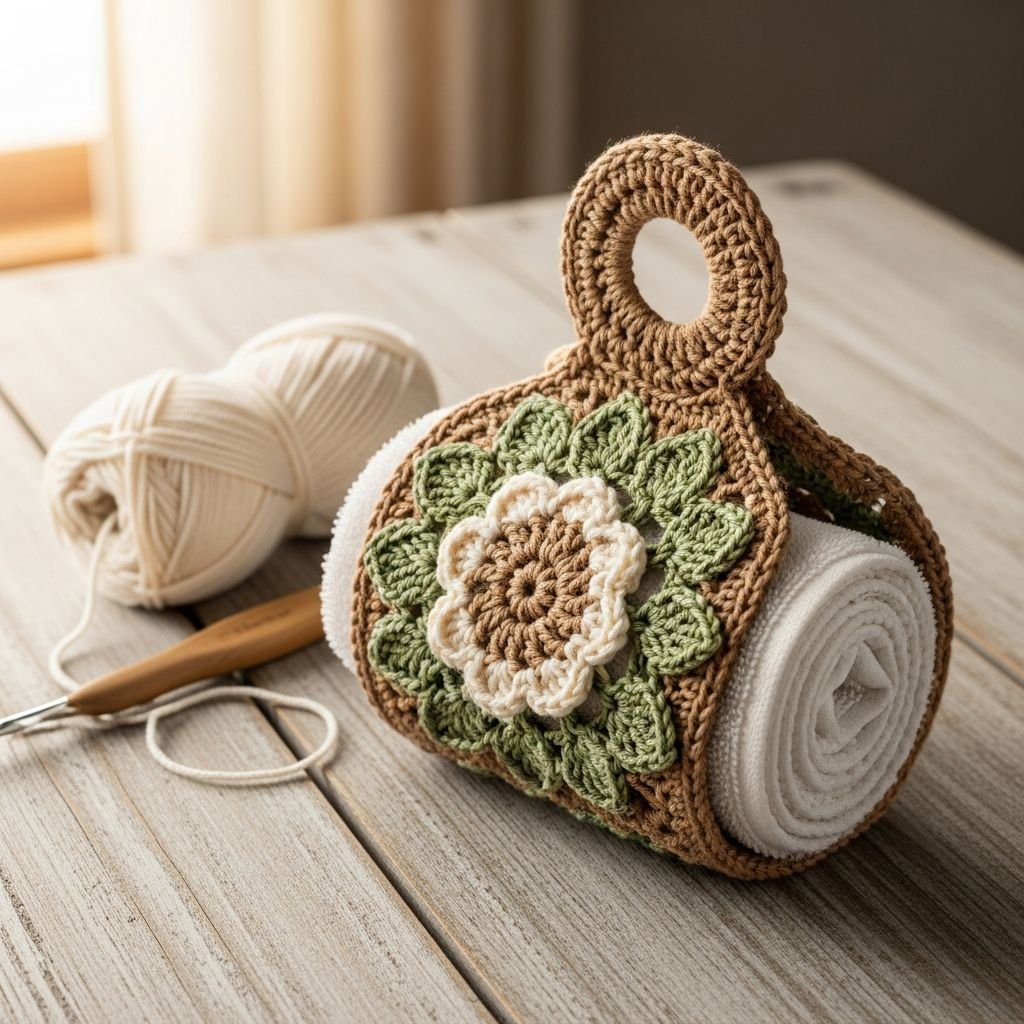
Rustic Floral Crochet Towel Holder: A Masterclass Tutorial-Transform your kitchen or bathroom with this elegant and functional crochet towel holder. This project combines structural stability with delicate 3D floral aesthetics, featuring a sturdy hanging ring, a decorative fan-shaped body, and a reinforced grid to hold your favorite linens. Using durable cotton yarn, this piece is designed to be both a beautiful statement and a long-lasting household utility.
Materials Needed
- 100g Worsted weight cotton yarn (Beige or Cream)
- 4.0mm (G) Crochet hook
- 2-inch Plastic or wooden craft ring
- Tapestry needle for weaving ends
- Sharp crafting scissors
- Stitch markers
Abbreviations
- ch: chain
- sc: single crochet
- dc: double crochet
- tr: treble crochet
- sl st: slip stitch
- st(s): stitch(es)
- sk: skip
- sp: space
Step 1: Preparing the Hanging Ring

- Attach your yarn to the 2-inch ring using a slip knot and a slip stitch.
- Work approximately 36-40 single crochet (sc) stitches around the entire circumference of the ring.
- Ensure the stitches are packed tightly together so that no part of the plastic or wooden ring is visible.
- Join the round with a slip stitch to the first sc, but do not fasten off as we will build the body from here.
Step 2: Constructing the Fan-Shaped Body

- Chain 3 (counts as first dc) and work 12 dc into the bottom 1/3 of the ring stitches to create a base.
- Turn your work and increase by placing 2 dc in the first and last stitches of each row for the next 4 rows.
- This increasing technique creates the widening triangular fan shape seen in the central body.
- Maintain even tension to ensure the fabric remains flat and doesn’t curl at the edges.
Step 3: Adding the Scalloped Shell Border

- Once the fan body reaches the desired width, chain 1 and turn your work.
- Skip 2 stitches, then work 5 dc into the next stitch to create a ‘shell’ shape.
- Skip 2 more stitches and slip stitch into the next; repeat this pattern across the entire curved bottom edge.
- This creates the decorative 6-shell scalloped edge that gives the piece its vintage aesthetic.
Step 4: Crafting the 3D Layered Flower

- Start with a magic ring and work 6 sc into the ring, then join with a slip stitch.
- Work the first layer of petals by chaining 3 and working 3 dc into each stitch around.
- For the second and third layers, work behind the previous petals into the back loops to create depth.
- Use a mix of dc and treble crochet (tr) for the outer petals to make them larger and more prominent.
- Leave a long tail after fastening off to sew the flower onto the center of the fan body.
Step 5: Building the Towel Support Grid

- Reattach yarn to the bottom of the fan body, just behind the scalloped edge.
- Work a foundation chain of 20 stitches and connect it to the opposite side to form a loop.
- Work rows of ‘dc, ch 1, sk 1’ across this loop to create a lattice or mesh grid pattern.
- Repeat for 3 rows to ensure the grid is strong enough to support the weight of a damp hand towel.
Step 6: Final Assembly and Side Tabs

- Center the 3D flower on the fan body and sew it securely using your tapestry needle and the long yarn tail.
- Work sc stitches down the vertical sides of the grid to create the small side reinforcement tabs.
- Check all joints for strength, ensuring the connection between the ring and the fan is particularly secure.
- Fasten off and weave in all remaining loose ends on the back of the project for a professional finish.
Frequently Asked Questions
Q: What type of yarn is best for this project?
A: 100% Cotton yarn is highly recommended because it is durable, doesn’t stretch as much as acrylic, and handles moisture well, which is essential for a towel holder.
Q: How do I prevent the fan body from sagging?
A: Ensure your tension is firm. If you tend to crochet loosely, drop down to a 3.5mm hook to create a stiffer, more structural fabric.
Q: Can I machine wash the towel holder?
A: Yes, if made of cotton. Place it in a mesh laundry bag and wash on a delicate cycle, then reshape it and lay it flat to dry to maintain the 3D shape of the flower.
Conclusion
Congratulations on completing your professional Crochet Towel Holder! This piece is a perfect example of how complex textures like the 3D flower and shell border can elevate a simple household item. Whether you keep it for your own home or gift it to a friend, this holder is sure to be a conversation starter. Happy crocheting!