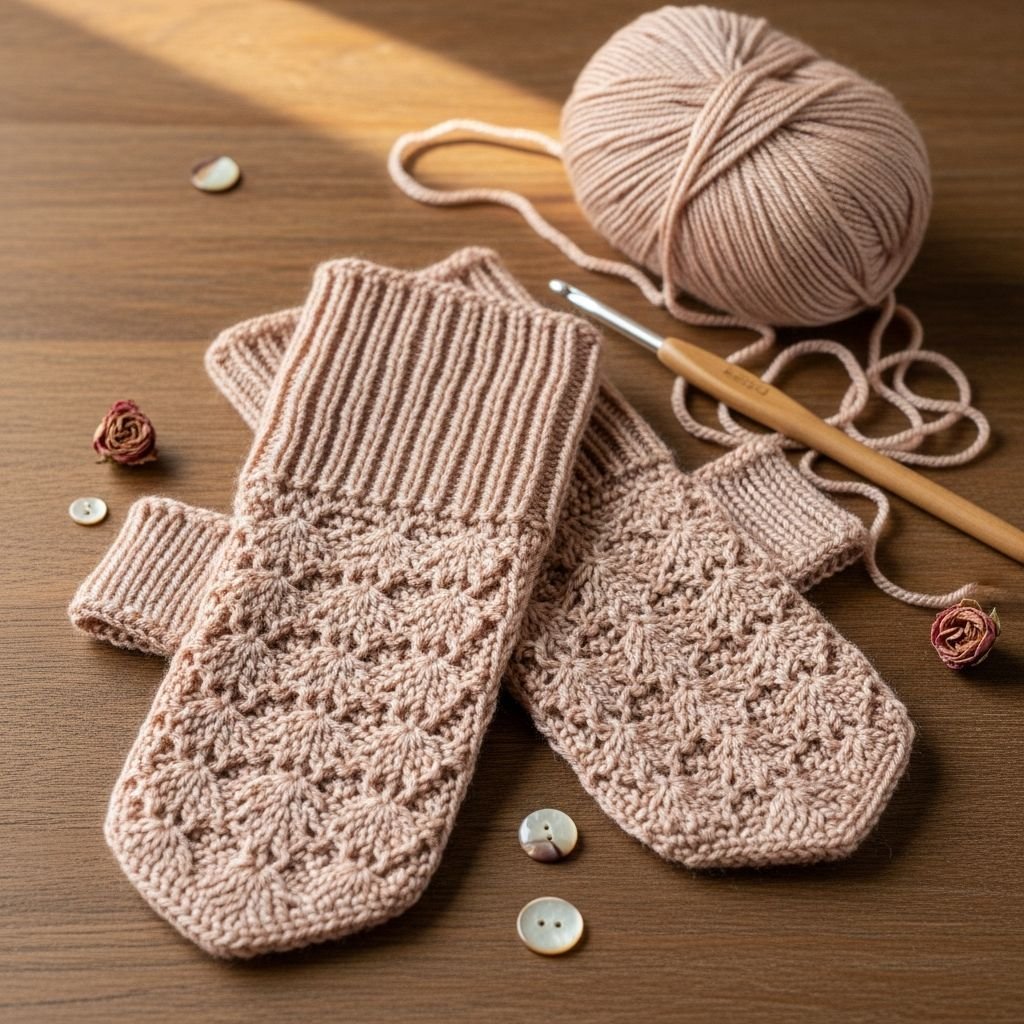
Vintage Romance Ribbed and Lace Fingerless Mitts-Embrace the elegance of a bygone era with these delicate fingerless gloves. Combining a structured, cozy ribbed cuff with a whimsical cream shell-stitch trim, these mitts are the perfect accessory for tea parties or chilly mornings with a book. This tutorial will guide you through creating a pair that fits perfectly and features the charming satin bow detail seen in the inspiration image.
Materials Needed
- 50g Sport weight yarn in Soft Pink
- 25g Sport weight yarn in Cream/Ivory
- 3.5mm (E) crochet hook
- Two 10-inch lengths of 1/2-inch satin ribbon
- Yarn needle and sharp scissors
- Measuring tape
Abbreviations
- ch: chain
- sc: single crochet
- dc: double crochet
- blo: back loop only
- sl st: slip stitch
- st(s): stitch(es)
- sk: skip
Step 1: Constructing the Ribbed Cuff

- Using the pink yarn, start with a slip knot and chain 36 (or the number needed to reach from your wrist to mid-forearm).
- Row 1: Sc in the second chain from the hook and in each chain across, turn.
- Row 2: Ch 1, sc in the BLO (back loop only) of every stitch across to create the elastic ribbed texture, turn.
- Repeat Row 2 until the piece is long enough to wrap snugly around your wrist when slightly stretched.
- Ensure you end on an even number of rows to make the joining process seamless.
Step 2: Joining the Cuff into a Cylinder

- Fold the rectangular ribbed piece in half so the short ends meet.
- Align the stitches of the last row with the foundation chain row.
- Sl st through both layers for each stitch across to join the cuff into a tube shape.
- Fasten off the pink yarn and weave in the starting tail, leaving the top edge open for the lace transition.
Step 3: Transitioning to the Lace Hand Section

- Attach the cream yarn to the top edge of the pink cuff with a slip stitch.
- Round 1: Ch 1, work one sc into the end of every ribbing row around the circumference of the cuff, join with a sl st to the first sc.
- Round 2: Ch 3 (counts as first dc), dc in each stitch around to create a solid base for the shell pattern.
- Count your stitches to ensure you have a multiple of 4 or 6, depending on your preferred shell width.
Step 4: Working the Shell Stitch Pattern

- Round 3: Ch 1, sc in the first st, *sk 2 sts, 5 dc in the next st, sk 2 sts, sc in the next st; repeat from * around, join with a sl st.
- Round 4: Sl st into the center dc of the first shell, ch 1, sc in the same st, *5 dc in the sc from the previous round, sc in the center dc of the next shell; repeat from * around.
- Repeat Round 4 until the cream section reaches the base of your thumb (approximately 1.5 to 2 inches).
Step 5: Creating the Thumb Opening

- In the next pattern round, work the shell stitches as established until you reach the side of the hand.
- To create the thumb hole, chain 6 and skip one full shell repeat (one sc and one 5-dc shell).
- Resume the shell stitch pattern in the next sc and complete the round as usual.
- In the following round, work your shell stitches directly into the ch-6 space to integrate the thumb opening into the lace design.
Step 6: Scalloped Edging and Finishing

- Continue the shell pattern for 2 more rounds after the thumb opening, or until it reaches your knuckles.
- For the final round, work 7 dc into each shell base instead of 5 to create a more dramatic, flared scalloped edge.
- Fasten off the cream yarn and use your yarn needle to weave in all remaining ends on the inside of the glove.
- Repeat all steps to create a matching second glove, ensuring the thumb hole is placed on the opposite side.
Step 7: Adding the Decorative Satin Bows

- Tie your two satin ribbons into neat, symmetrical bows with tails roughly 1 inch long.
- Position a bow on the outer wrist of each glove, just at the transition point between the pink ribbing and cream lace.
- Using a needle and matching pink thread (or a small scrap of yarn), sew the center knot of the bow securely to the glove.
- Lightly singe the ends of the ribbon with a lighter to prevent fraying for a professional finish.
Frequently Asked Questions
Q: How do I make the gloves smaller or larger?
A: The size is determined by the ribbed cuff. To make it larger, add more rows to the ribbing until it fits your wrist. To make it longer, increase the starting chain length of the pink section.
Q: What is the best way to wash these gloves?
A: Because of the delicate shell stitches and the satin ribbon, I recommend hand-washing in cool water with a mild detergent and laying them flat to dry to maintain their shape.
Q: Can I use a different yarn weight for this pattern?
A: Yes, but it will change the scale. If using Worsted (Level 4) yarn, use a 5.0mm hook and perform fewer shell repeats. Always check your gauge against your hand as you go.
Conclusion
Congratulations on completing your Vintage Romance Mitts! These gloves are more than just a winter accessory; they are a statement piece that showcases your mastery of texture and lace. Whether you wear them while sipping coffee or gift them to a dear friend, they are sure to be cherished for years to come. Happy stitching!