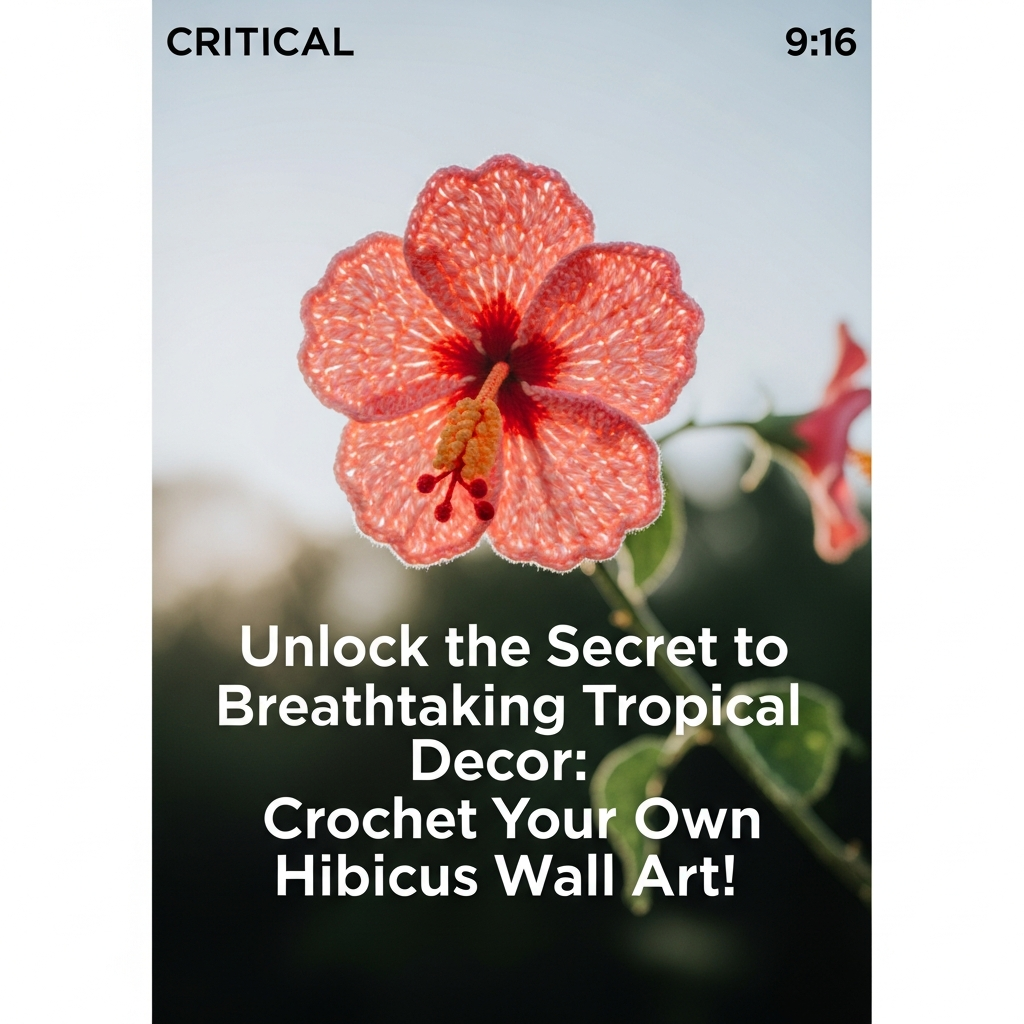
DIY Crochet Hibiscus Wall Hanging Pattern – Tropical Floral Decor-Welcome to our latest masterclass! Today we are learning how to create this beautiful piece.
Materials Needed
- Cotton or acrylic yarn in various shades of pink, red, and dark green
- Small amount of yellow or gold yarn/embroidery floss for flower centers (or small yellow beads)
- Crochet hook (size appropriate for your yarn, e.g., 2.5mm – 3.5mm)
- Yarn needle (tapestry needle)
- Scissors
- Small wooden dowel or natural stick (approx. 6-8 inches long)
- Matching green yarn or cord for hanging
Step-by-Step Instructions
Step 1
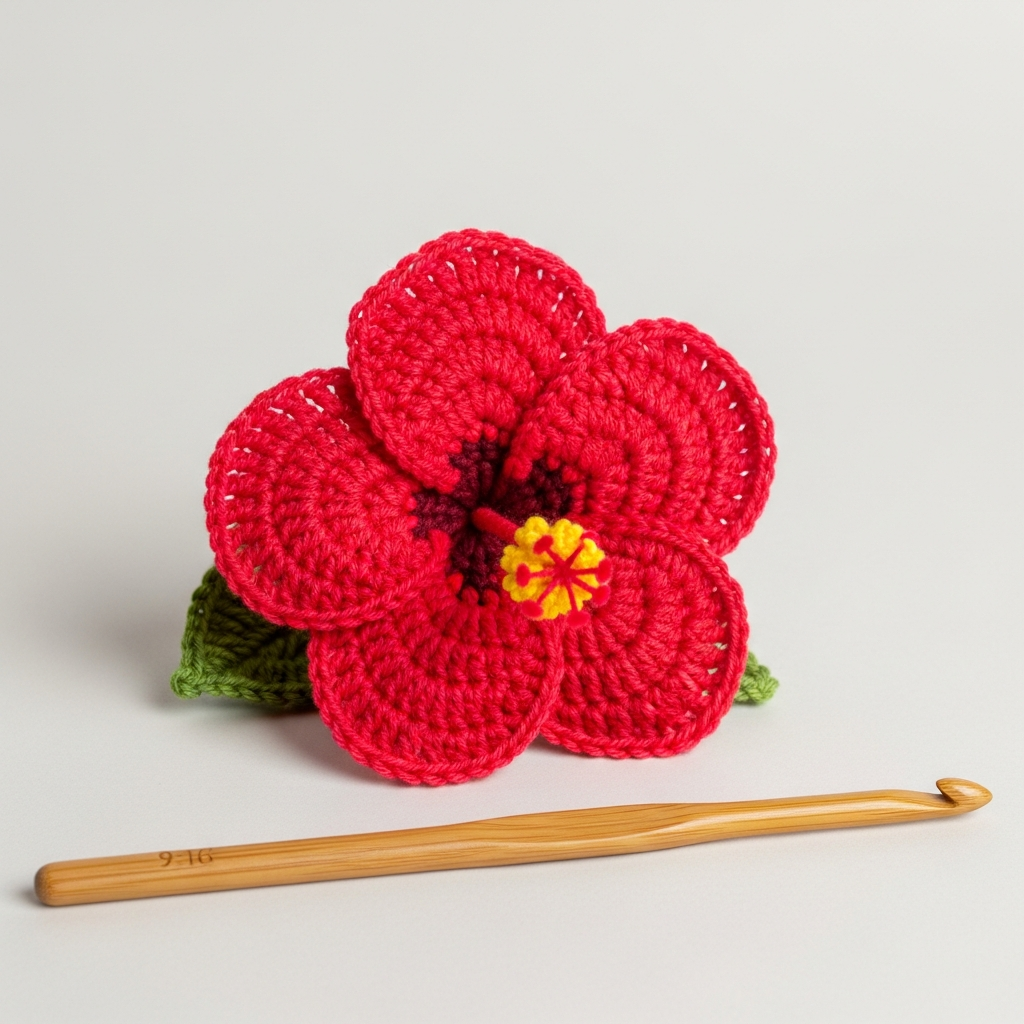
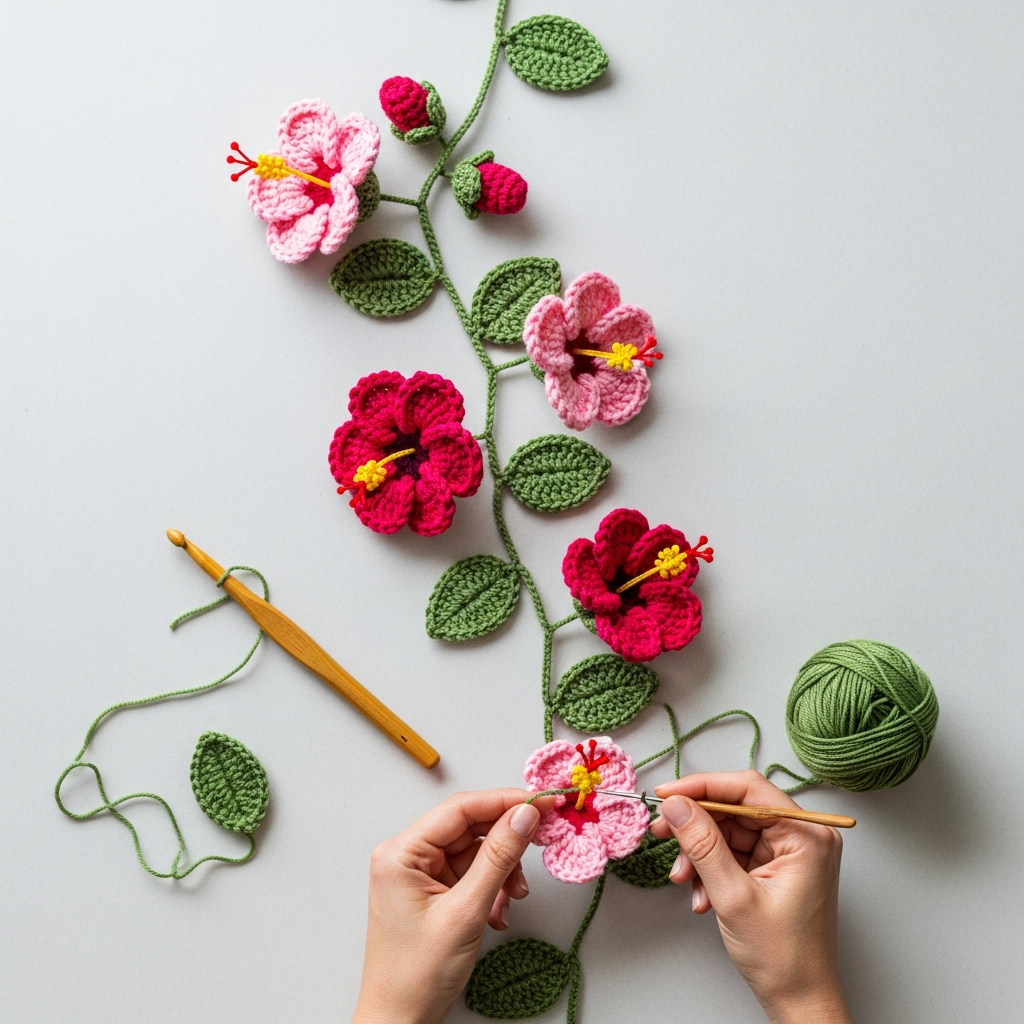
Begin by crocheting multiple hibiscus flowers in varying shades of pink and red. Each flower typically consists of 5 petals. Use basic crochet stitches like chains, single crochet, half double crochet, and double crochet to form the petals, working in rounds from a central ring. Aim for 5-7 flowers for a full wall hanging.
Step 2
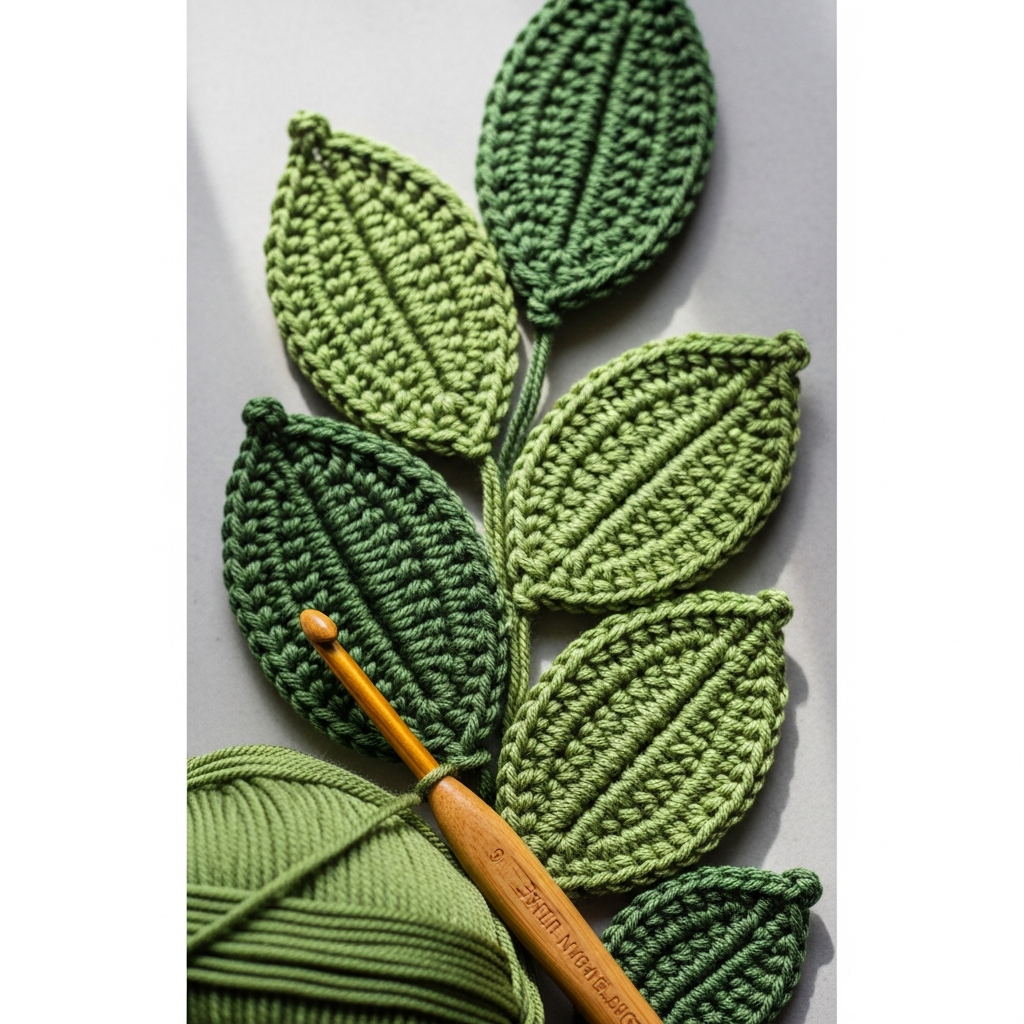
Create several small, pointed leaves using dark green yarn. Each leaf can be made by chaining and then working single crochet, half double crochet, and double crochet stitches around the chain to form the leaf shape, tapering at the end. Ensure you make enough leaves to accompany each flower and add density to the vine.
Step 3
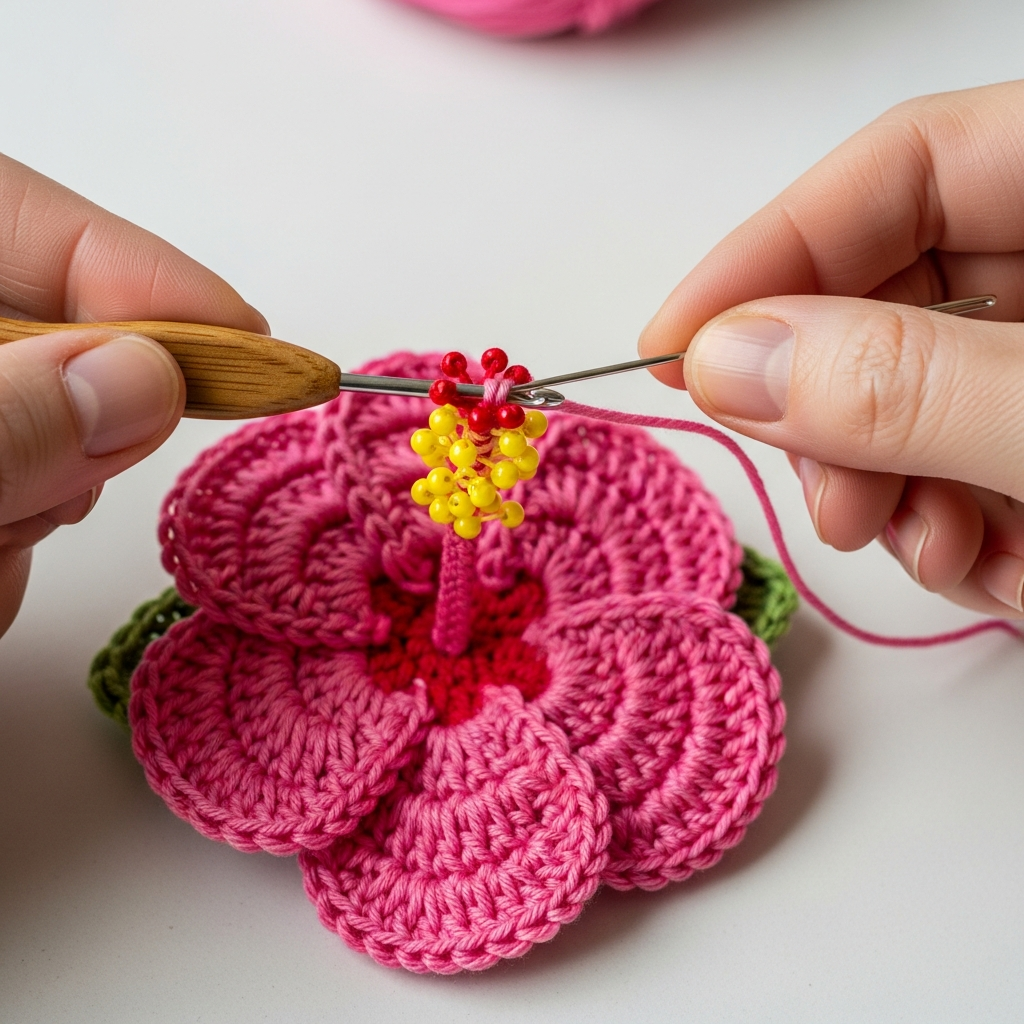
For each hibiscus flower, add the distinctive pistil and stamens. This can be done by crocheting a small stem in a contrasting color (like dark pink or red) and attaching small yellow beads or using yellow embroidery floss to create the stamens at the tip. Securely attach this central piece to the middle of each crocheted flower.
Step 4
Crochet a long, sturdy vine or stem using green yarn (this can be a chain of single crochets or a simple cord). Strategically attach the finished hibiscus flowers and leaves along this vine using a yarn needle, alternating colors and leaf placement to create a natural, cascading effect. Ensure even spacing.
Step 5
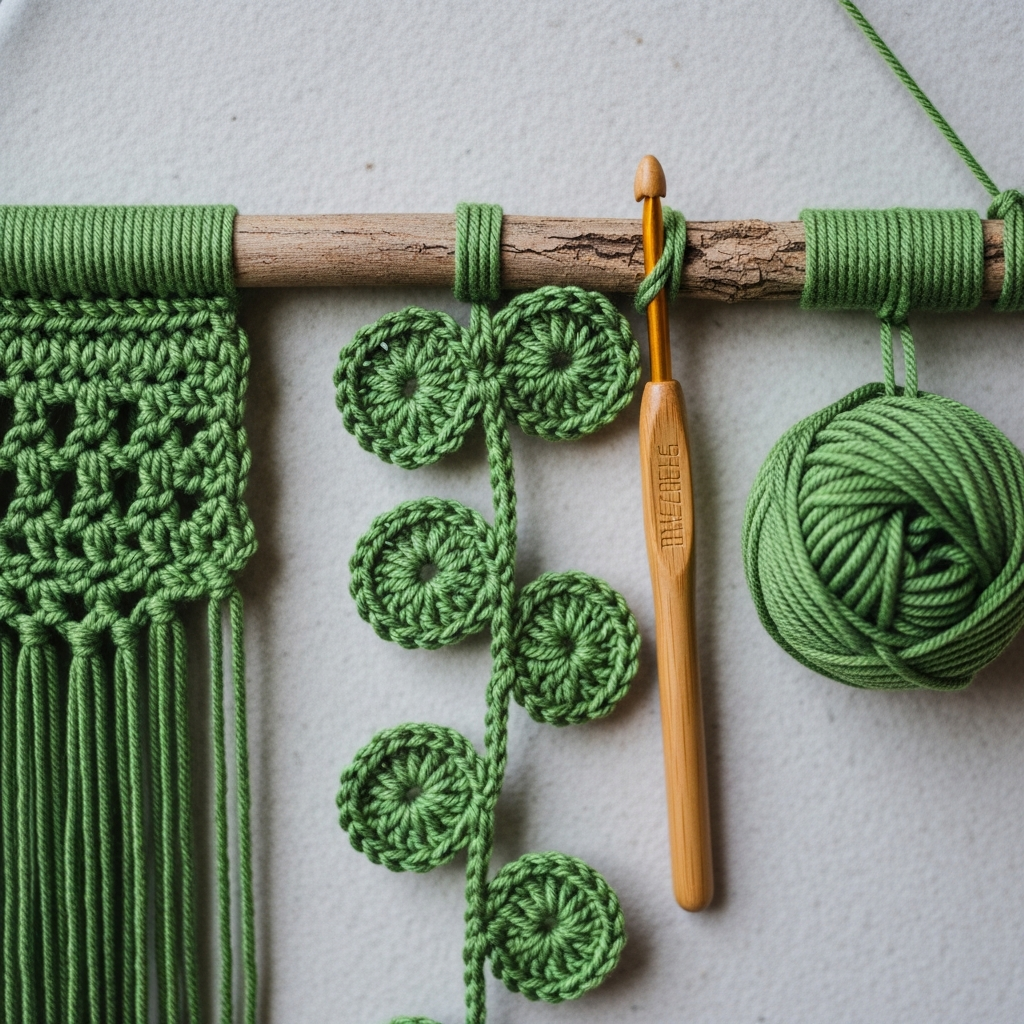
Take your chosen wooden dowel or stick. Drape the top of the assembled floral vine over the dowel. Securely attach the vine to the dowel by wrapping and tying green yarn around both the dowel and the top section of the vine at a few points, ensuring it hangs evenly.
Step 6
Cut a suitable length of green yarn or cord for hanging. Tie each end of this string securely to either side of the wooden dowel, creating a loop from which the entire wall hanging can be suspended. Adjust the length of the hanging string as desired.
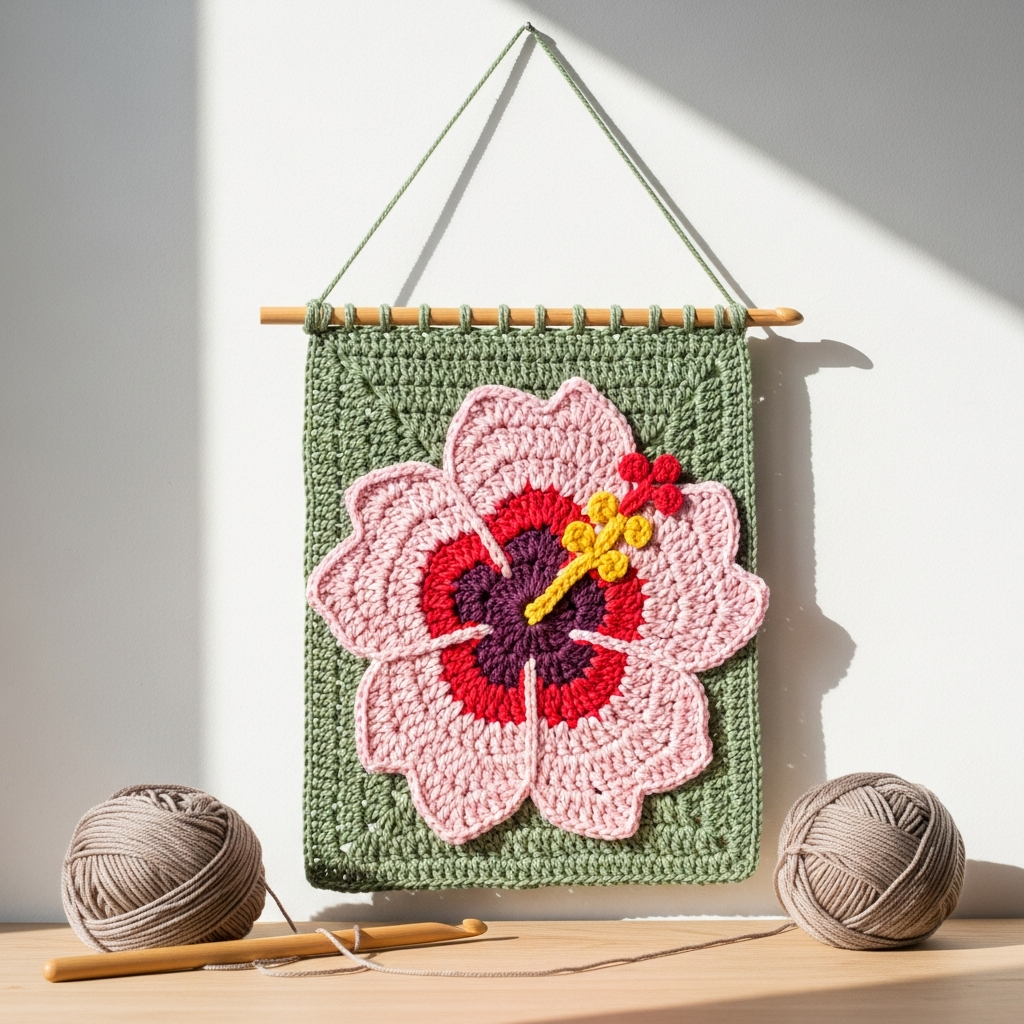
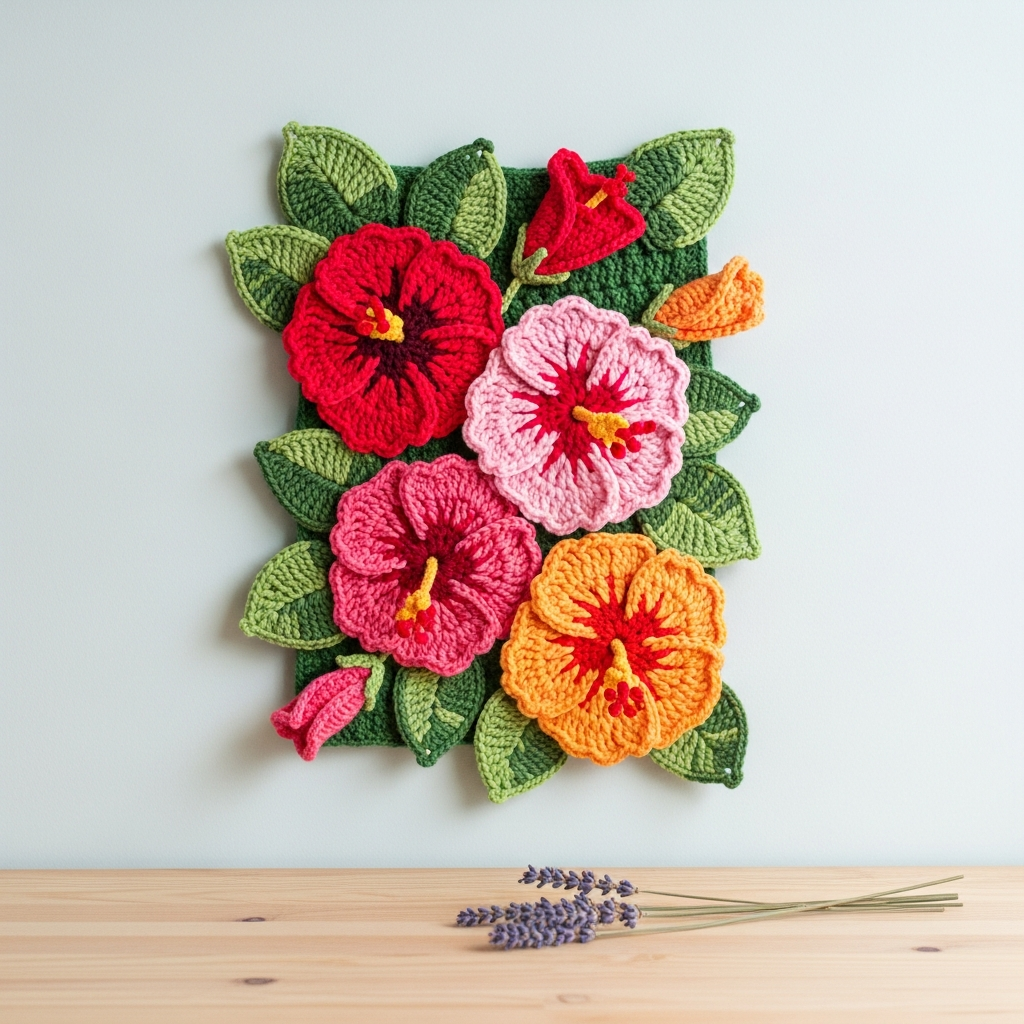
Final Showcase
Frequently Asked Questions
Q: Is this project suitable for beginners?
A: While making individual hibiscus flowers and leaves involves basic stitches, assembling them and achieving a polished look might be better suited for intermediate crocheters or confident beginners willing to learn new techniques.
Q: Can I customize the colors of the flowers?
A: Absolutely! This project is highly customizable. Feel free to choose any color palette that matches your home decor or personal preference. Blues, whites, yellows, or even variegated yarns would look beautiful.
Q: How do I clean my crochet wall hanging?
A: It’s best to spot clean any soiled areas with a mild soap and cold water. If a full wash is needed, hand wash gently in cold water with a wool-friendly detergent, squeeze excess water, reshape, and lay flat to air dry. Avoid machine washing or drying.
Conclusion
This beautiful crochet hibiscus wall hanging is a delightful way to bring a touch of tropical elegance and handmade charm to any space. Follow these steps to create your own vibrant floral decor piece!