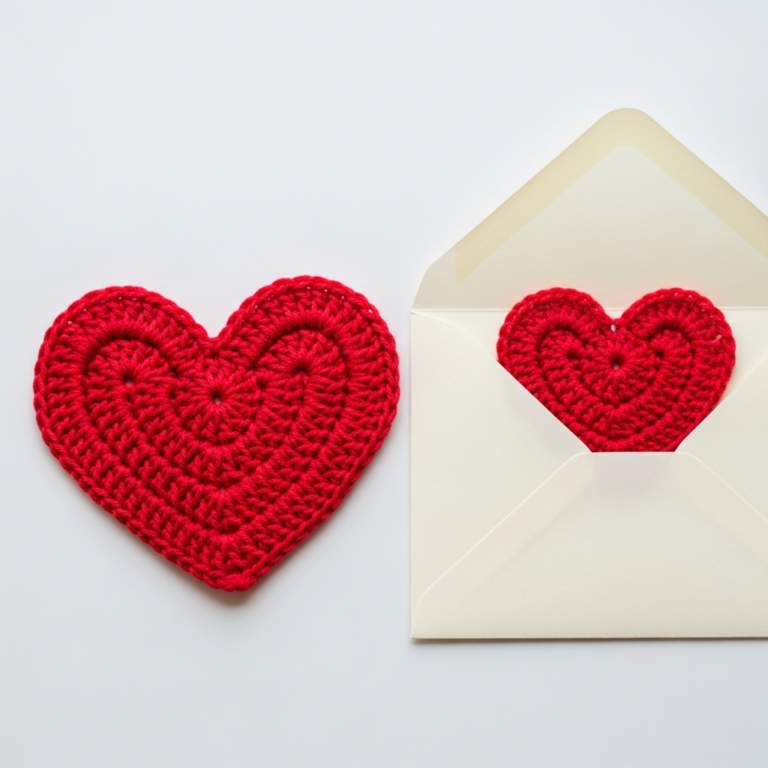
Quick Crochet Envelope Gift Card Holder Pattern | Valentine Pouch-Welcome to the perfect quick-gift project! These adorable envelope gift card holders transform a simple plastic card into a thoughtful, handcrafted present. Whether you’re celebrating Valentine’s Day, a birthday, or just offering a token of appreciation, presenting it in a handmade crochet envelope adds immense sentimental value. This pattern is designed for the intermediate crocheter, relying on dense single crochet stitches for structure and simple shaping techniques for the iconic envelope flap. The finished size is perfectly tailored to fit standard credit or gift cards, making it incredibly practical. We will be utilizing clean color changes to achieve the signature blocked aesthetic shown in the sample images—combining rich reds, bright pinks, and creamy whites. Gather your worsted weight yarn, and let’s create a charming little carrier that will delight any recipient. The fast turnaround time makes this an excellent project for bulk production or last-minute crafting.
Project Details
- Difficulty: Intermediate
- Time Estimate: 1.5 hours per holder
Materials Needed
- Worsted Weight (Category 4) Yarn in 2 or 3 contrasting colors (A, B, C)
- 4.0 mm (G/6) Crochet Hook
- Small decorative button (approx. 1/2 inch)
- Yarn Needle
- Scissors
Abbreviations
- ch: chain
- sc: single crochet
- sl st: slip stitch
- st(s): stitch(es)
- inc: single crochet increase (2 sc in one st)
- dec: single crochet decrease (sc2tog)
- dc: double crochet
- MR: Magic Ring
Instructions
Step 1: Crocheting the Main Body Panel
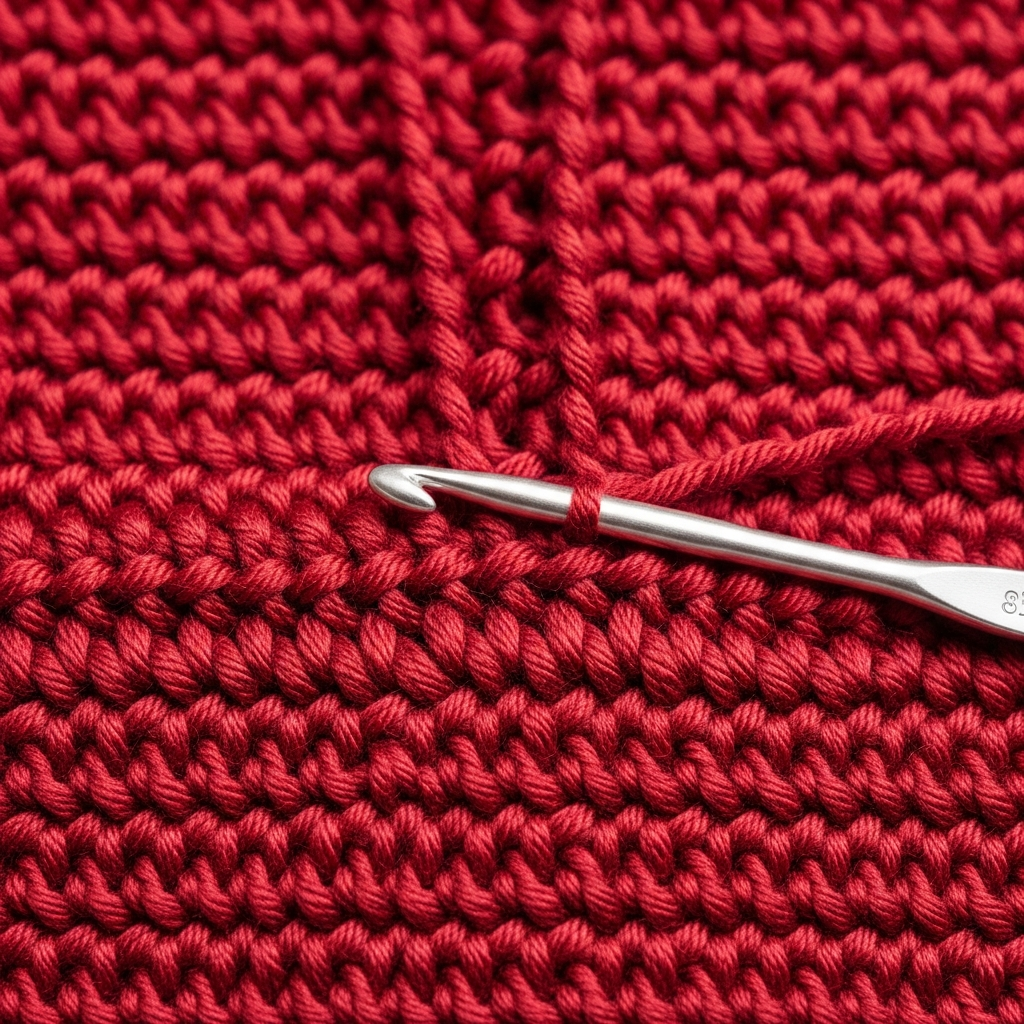
Using Color A (e.g., deep red or dark pink), Ch 17. R1: Sc in the 2nd ch from the hook and in each ch across. (16 sc). R2-R12: Ch 1, turn. Sc in each st across. (16 sc). Fasten off Color A. R13-R24: Join Color B (e.g., light pink). Ch 1, turn. Sc in each st across. (16 sc). This panel is one long rectangle composed of two color blocks. The bottom third (R1-12) will form the back pocket, and the middle third (R13-24) will form the front.
Step 2: Shaping the Envelope Flap (Triangle)
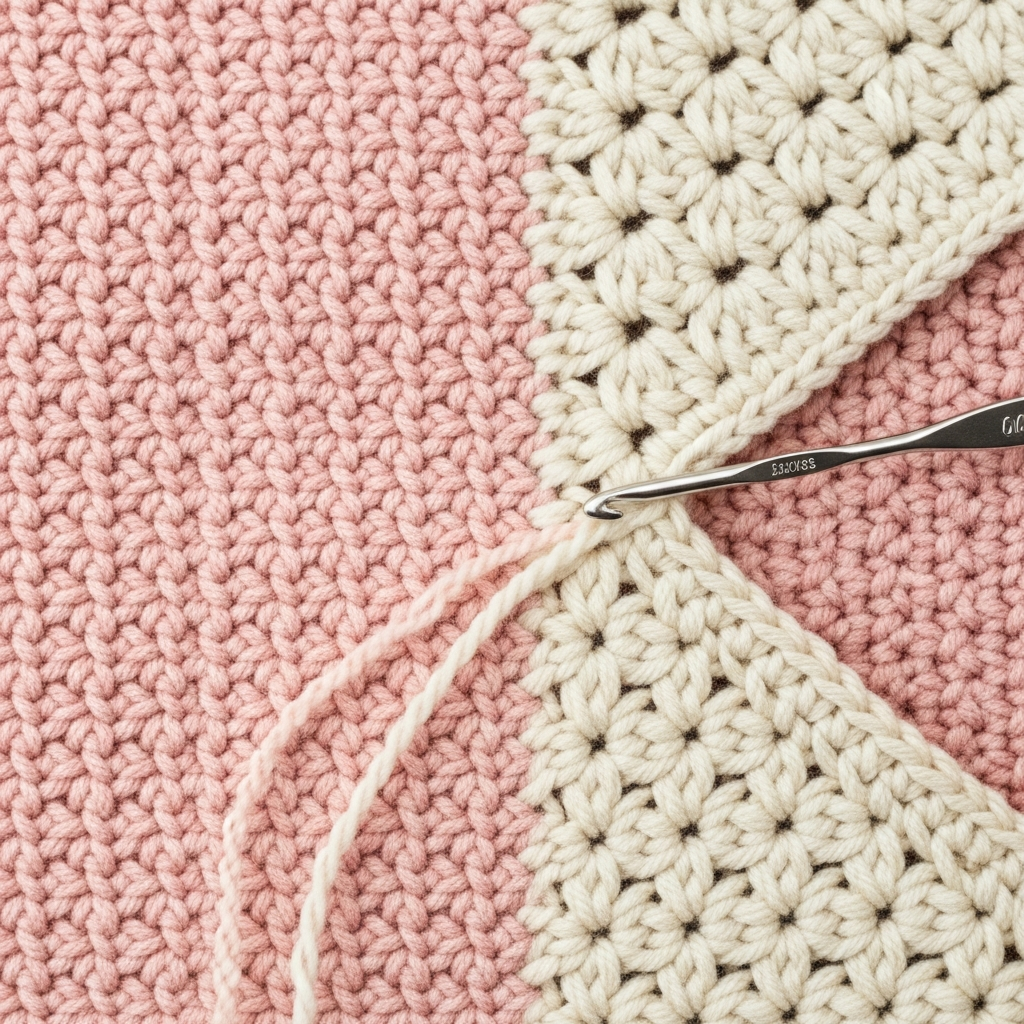
The flap is worked directly onto the end of the main body (R25 onward). Using Color B (or Color C for contrast, e.g., cream): R25: Ch 1, turn. Sc in the first st, sc in the next 14 sts, dec over the last 2 sts. (15 sc). R26: Ch 1, turn. Dec over the first 2 sts, sc across until 2 sts remain, dec over the last 2 sts. (13 sc). Continue decreasing 2 stitches per row (one decrease at the beginning and one at the end) until you reach 1 sc remaining. Fasten off and weave in ends. You should have a neatly tapered triangle flap.
Step 3: Assembly and Seaming the Pouch

Fold the body panel. Fold R1-R12 (Color A) up to meet R24 (end of Color B). This creates the pocket opening. Using Color A, sl st or whipstitch the two sides together along the edges (along the vertical sides of the 12 rows). Ensure the seams are tight to prevent the card from slipping out. Do not seam the top edge (where R12 meets R13). Weave in all yarn tails securely. The flap (the triangle section) should remain free.
Step 4: Crocheting the Tiny Heart Appliqué
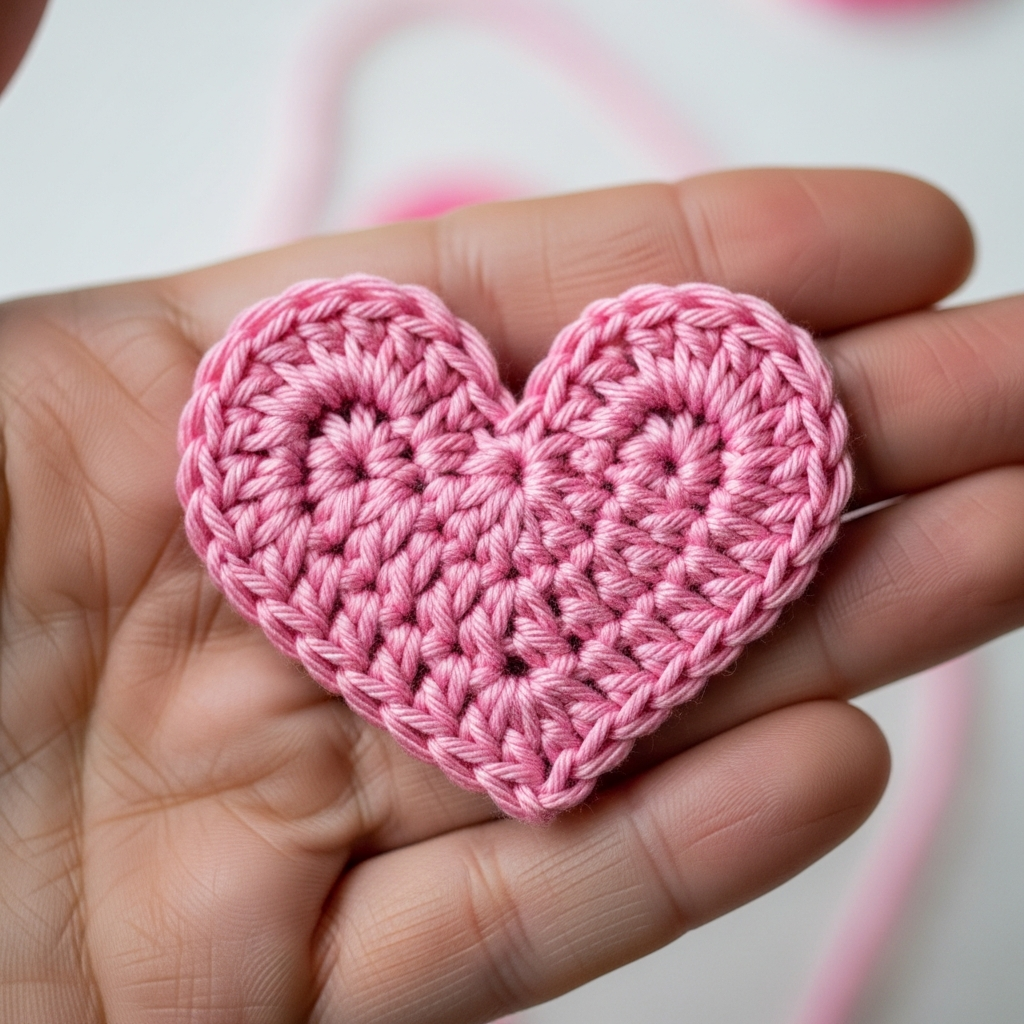
Using Color C (or any desired accent color): Start with a MR. Ch 3 (counts as a dc). Work the following stitches into the MR: 2 dc, 2 hdc, 1 sc, 1 sl st, 1 sc, 2 hdc, 3 dc. Pull the tail tight to close the MR. Sl st to the top of the initial ch 3 to join. Fasten off, leaving a long tail for sewing. This creates a small, dense heart shape suitable for the closure.
Step 5: Attaching the Embellishment and Button Closure
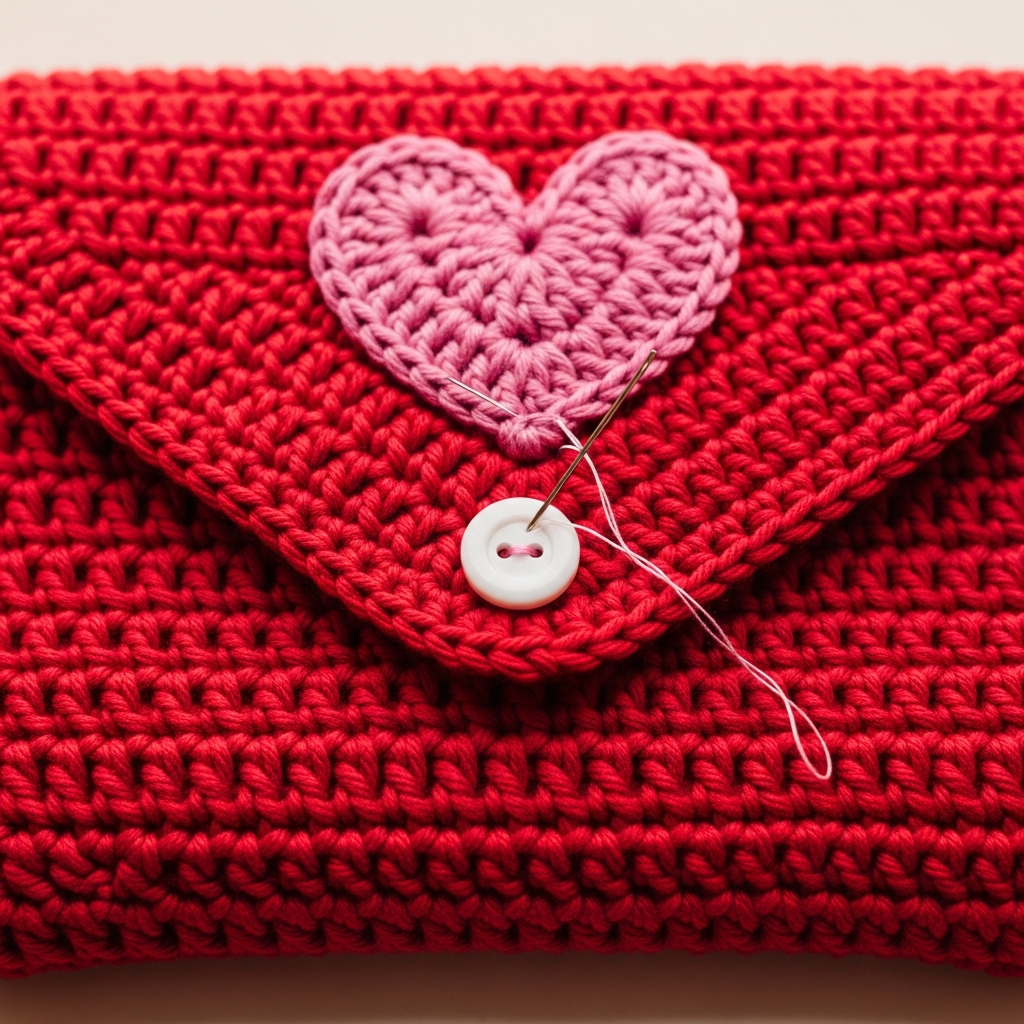
Position the heart appliqué on the tip of the triangular flap. Sew the heart securely to the flap using the long tail left from Step 4. Next, sew the small decorative button onto the body of the pouch, positioning it centrally where the heart naturally rests when the flap is closed. The button should sit just below the V-point of the envelope flap. The slight density of the crochet fabric allows the heart to hook over the button without needing a formal buttonhole, providing a snug closure. Weave in and trim any remaining ends.
Frequently Asked Questions
My gift card is slightly larger. How can I adjust the size?
To adjust the width, add or subtract chains in Step 1. Ensure your starting chain results in a width approximately 0.5 inches wider than your card. To adjust the height, add or subtract pairs of rows in Step 1 (e.g., add 2 rows to Color A and 2 rows to Color B) while maintaining the 1:1:1 ratio for the back, front, and flap sections.
Can I use double crochet (dc) instead of single crochet (sc)?
While technically possible, single crochet is strongly recommended for this pattern. DC creates a looser, lacier fabric, which might allow the gift card to slip out or reduce the structural integrity needed to hold the envelope shape securely. If you must use DC, size down your hook significantly to create a much denser gauge.
How should I wash and care for my finished crochet gift holder?
Due to the dense stitch work and the small button, we recommend hand washing these holders in cool water with mild detergent. Gently squeeze out excess water and lay them flat on a towel to air dry, reshaping them lightly if necessary. Avoid machine washing or drying, especially if using delicate accent yarns or wooden buttons.
Congratulations on completing your stylish Crochet Envelope Gift Card Holder! This pattern not only offers a functional and beautiful way to present gifts but also allows you to creatively play with color combinations tailored to any holiday or occasion. These little pouches are addictive to make, and we encourage you to experiment with different yarn textures and button styles to personalize your set. Don’t forget to snap a photo of your finished holder tucked with its gift card and share it online! Happy Hooking!